simple后台管理系统(前端篇)
项目创建
Note
确保你安装了最新版本的 Node.js,并且你的当前工作目录正是打算创建项目的目录。
在 Vue3 官方文档 快速上手 | Vue.js (vuejs.org) 小节中,推荐使用 pnpm create vue@latest 创建项目,这一指令将会安装并执行 create-vue,它是 Vue 官方的项目脚手架工具。你将会看到一些诸如 TypeScript 和测试支持之类的可选功能提示,如下所示: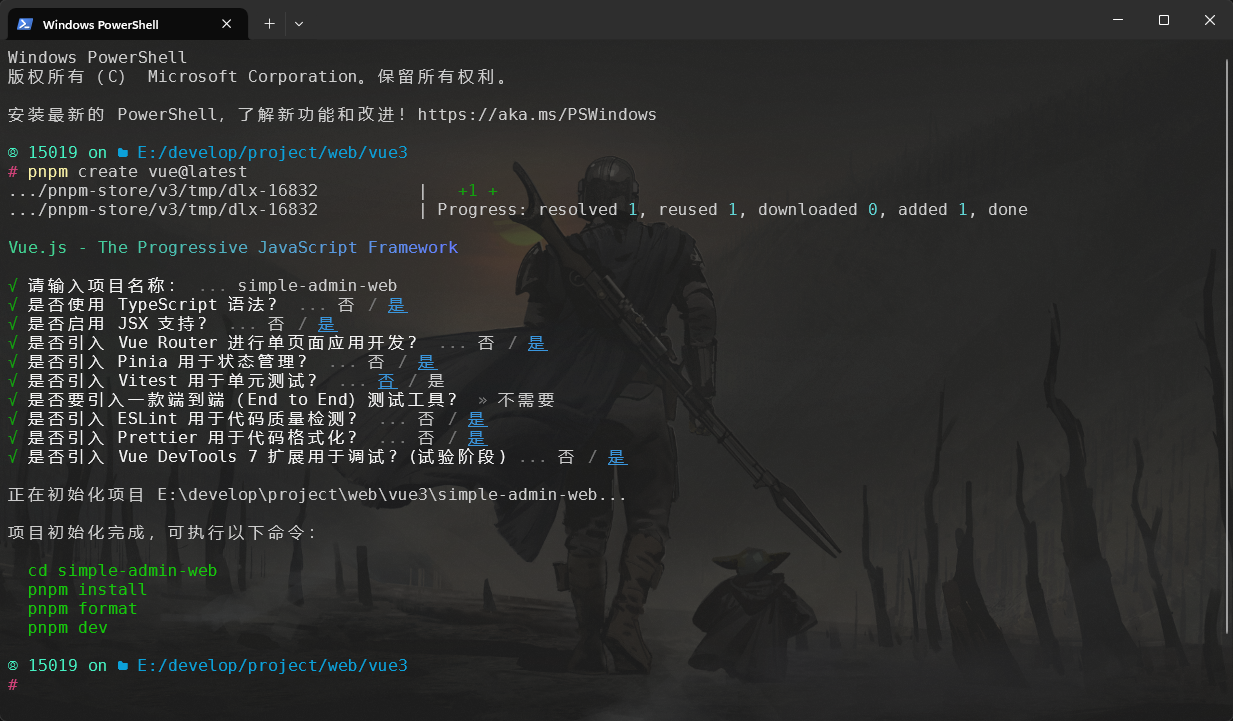
在项目被创建后,通过以下步骤安装依赖并启动开发服务器,如下所示:
清理工作
删除所有不需要的内容:
- 删除
components目录下的所有组件; - 删除
views目录下的所有页面组件及其引用; - 删除
assets目录下的所有样式文件及其引用; - 删除
stores目录下的所有文件;
协作规范
editorconfig
在项目根目录下创建 .editorconfig 配置文件,即可让项目下所有文件都统一代码风格!
# EditorConfig is awesome: https://EditorConfig.org

# top-most EditorConfig file
root = true

# 适用于所有文件类型
[*]
# 设置文件字符集为 utf-8
charset = utf-8
# 缩进风格(tab | space)
indent_style = space
# 缩进大小
indent_size = 2
# 换行符(lf | cr | crlf)
end_of_line = lf
# 去除换行行首的任意空白字符
trim_trailing_whitespace = true
# 始终在文件末尾插入一个空行
insert_final_newline = true

[*.md]
insert_final_newline = false
trim_trailing_whitespace = falseeslint
举个栗子:在开发过程当中,你可能会碰到由于不符合 eslint 的某条规则而报错,如下所示:当你的组件名称为 index.vue 时就会抛出如下错误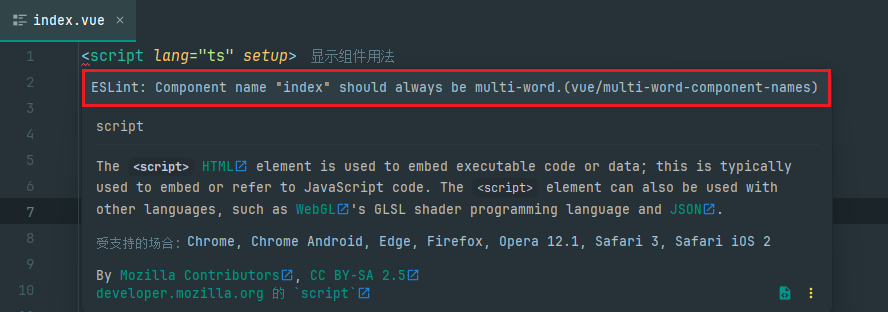
但是你觉得让这个错误不应该出现,因此你可以在 eslint 的配置文件 .eslintrc.cjs 中禁用掉该规则,其中有一个 overrides 配置选项,该选项可以用来为特定的文件指定不同的规则。
/* eslint-env node */
require('@rushstack/eslint-patch/modern-module-resolution')

module.exports = {
  root: true,
  'extends': [
    'plugin:vue/vue3-essential',
    'eslint:recommended',
    '@vue/eslint-config-typescript',
    '@vue/eslint-config-prettier/skip-formatting'
  ],
  parserOptions: {
    ecmaVersion: 'latest'
  },
  overrides: [
    {
      files: ['src/**/*.vue'],
      rules: {
        'vue/multi-word-component-names': 'off'
      }
    }
  ]
}prettier
{
  "$schema": "https://json.schemastore.org/prettierrc",
  "semi": false,
  "tabWidth": 2,
  "singleQuote": true,
  "printWidth": 100,
  "trailingComma": "none"
}准备工作
CSS 预处理器
Vite 同时提供了对 .scss, .sass, .less, .styl 和 .stylus 文件的内置支持。没有必要为它们安装特定的 Vite 插件,但必须安装相应的预处理器依赖:pnpm add -D sass。
如果使用的是单文件组件,可以通过 <style lang="scss">(或其他预处理器)自动开启。
ElementPlus 集成
安装 ElementPlus:
pnpm i element-plusElementPlus 按需导入:
首先,需要安装
unplugin-vue-components和unplugin-auto-import这两款插件:shpnpm i -D unplugin-vue-components unplugin-auto-import使用插件:修改
vite.config.ts配置文件tsimport { fileURLToPath, URL } from 'node:url' import { resolve } from 'path' import { defineConfig } from 'vite' import vue from '@vitejs/plugin-vue' import vueJsx from '@vitejs/plugin-vue-jsx' import VueDevTools from 'vite-plugin-vue-devtools' import AutoImport from 'unplugin-auto-import/vite' import Components from 'unplugin-vue-components/vite' import { ElementPlusResolver } from 'unplugin-vue-components/resolvers' const pathSrc = resolve(__dirname, 'src') // https://vitejs.dev/config/ export default defineConfig({ plugins: [ vue(), vueJsx(), VueDevTools(), AutoImport({ resolvers: [ // 自动导入 Element Plus 相关函数,如:ElMessage, ElMessageBox... (带样式) ElementPlusResolver() ], // 自动导入 Vue 相关函数,如:ref, reactive, toRef 等 // 自动导入 VueRouter 相关函数,如:useRouter 等 // 自动导入 Pinia 相关函数,如:createPinia,defineStore,storeToRefs 等 // 参考自: https://github.com/sxzz/element-plus-best-practices/blob/main/vite.config.ts imports: ['vue', 'vue-router', 'pinia'], // 是否在 vue 模板中自动导入 vueTemplate: true, // 指定自动导入函数TS类型声明文件路径,为true时在项目根目录自动创建,为false时关闭自动生成 dts: resolve(pathSrc, 'typings', 'auto-imports.d.ts') }), Components({ resolvers: [ // 自动导入 Element Plus 组件 ElementPlusResolver() ], // 组件名称包含目录,防止同名组件冲突 directoryAsNamespace: true, // 指定自定义组件位置(默认:src/components) dirs: ['src/components', 'src/**/components'], // 指定自动导入组件TS类型声明文件路径,为true时在项目根目录自动创建,为false时关闭自动生成 dts: resolve(pathSrc, 'typings', 'components.d.ts') }) ], resolve: { alias: { '@': pathSrc } } })
iconify 集成
以下步骤参考自:Icon 图标 | Element Plus (element-plus.org)
使用 unplugin-icons 和 unplugin-auto-import 从 iconify 中自动导入任何图标集。您可以参考此模板。
安装
unplugin-icons和iconify:pnpm i -D unplugin-icons @iconify/json。使用插件:修改
vite.config.ts配置文件tsimport { fileURLToPath, URL } from 'node:url' import { resolve } from 'path' import { defineConfig } from 'vite' import vue from '@vitejs/plugin-vue' import vueJsx from '@vitejs/plugin-vue-jsx' import VueDevTools from 'vite-plugin-vue-devtools' import AutoImport from 'unplugin-auto-import/vite' import Components from 'unplugin-vue-components/vite' import { ElementPlusResolver } from 'unplugin-vue-components/resolvers' import Icons from 'unplugin-icons/vite' import IconsResolver from 'unplugin-icons/resolver' const pathSrc = resolve(__dirname, 'src') // https://vitejs.dev/config/ export default defineConfig({ plugins: [ vue(), vueJsx(), VueDevTools(), AutoImport({ resolvers: [ // 自动导入 Element Plus 相关函数,如:ElMessage, ElMessageBox... (带样式) ElementPlusResolver(), // 自动导入图标组件 IconsResolver() ], // 自动导入 Vue 相关函数,如:ref, reactive, toRef 等 // 自动导入 VueRouter 相关函数,如:useRouter 等 // 自动导入 Pinia 相关函数,如:createPinia,defineStore,storeToRefs 等 // 参考自: https://github.com/sxzz/element-plus-best-practices/blob/main/vite.config.ts imports: ['vue', 'vue-router', 'pinia'], // 是否在 vue 模板中自动导入 vueTemplate: true, // 指定自动导入函数TS类型声明文件路径,为true时在项目根目录自动创建,为false时关闭自动生成 dts: resolve(pathSrc, 'typings', 'auto-imports.d.ts') }), Components({ resolvers: [ // 自动导入 Element Plus 组件 ElementPlusResolver(), // 自动注册图标组件 IconsResolver({ // 只启用 element-plus 图标集,其他图标库 https://icon-sets.iconify.design/ enabledCollections: ['ep'] }) ], // 组件名称包含目录,防止同名组件冲突 directoryAsNamespace: true, // 指定自定义组件位置(默认:src/components) dirs: ['src/components', 'src/**/components'], // 指定自动导入组件TS类型声明文件路径,为true时在项目根目录自动创建,为false时关闭自动生成 dts: resolve(pathSrc, 'typings', 'components.d.ts') }), Icons({ // 自动安装图标库 autoInstall: true }) ], resolve: { alias: { '@': pathSrc } } })
TailwindCSS 集成
以下步骤参考自:Install Tailwind CSS with Vite - TailwindCSS中文文档 | TailwindCSS中文网
安装
tailwindcss及其对等依赖,然后生成tailwind.config.js和postcss.config.js文件。shpnpm i -D tailwindcss postcss autoprefixer npx tailwindcss init -p配置模板路径:在
tailwind.config.js文件中添加所有模板文件的路径。js/** @type {import('tailwindcss').Config} */ export default { content: ['./index.html', './src/**/*.{vue,js,ts,jsx,tsx}'], theme: { extend: {} }, plugins: [] }添加 Tailwind 指令:将每个 Tailwind 层的
@tailwind指令添加到/src/styles/index.scss文件中。scss@tailwind base; @tailwind components; @tailwind utilities;在
main.ts文件中引入/src/styles/index.scss文件。tsimport '@/styles/index.scss' import { createApp } from 'vue' import { createPinia } from 'pinia' import App from './App.vue' import router from './router' const app = createApp(App) app.use(createPinia()) app.use(router) app.mount('#app')
Normalize.css 集成
Normalize.css 使浏览器渲染所有元素更加一致,符合现代标准。它只针对需要规范化的样式。
- 安装 Normalize.css:
pnpm i normalize.css - 在
main.ts文件中引入 Normalize.css 样式:import 'normalize.css/normalize.css'
svg 图标集成
ElementPlus 图标库往往满足不了实际开发需要,因此需要通过集成 vite-plugin-svg-icons 插件来使用第三方(如 iconfont)图标库解决。
安装
pnpm i -D vite-plugin-svg-icons插件在
main.ts文件中引入注册脚本:import 'virtual:svg-icons-register'创建图标文件夹
src/assets/icons用于存放从 iconfont 上下载的 svg 图标修改
vite.config.ts配置文件tsimport svgLoader from 'vite-svg-loader' export default defineConfig({ plugins: [ // ... createSvgIconsPlugin({ // 指定需要缓存的图标文件夹 iconDirs: [resolve(pathSrc, 'assets/icons')], // 指定symbolId格式 symbolId: 'icon-[dir]-[name]' }) // ... ] })TypeScript 支持
json// tsconfig.json { "compilerOptions": { "types": ["vite-plugin-svg-icons/client"] } }组件封装
vue<script lang="ts" setup> const props = withDefaults( defineProps<{ prefix?: string iconClass: string color?: string size?: string }>(), { prefix: 'icon', size: '1em' } ) const symbolId = computed(() => `#${props.prefix}-${props.iconClass}`) </script> <template> <svg :style="'width:' + size + ';height:' + size" aria-hidden="true" class="svg-icon"> <use :fill="color" :xlink:href="symbolId" /> </svg> </template> <style lang="scss" scoped> .svg-icon { display: inline-block; width: 1em; height: 1em; overflow: hidden; vertical-align: -0.15em; /* 因icon大小被设置为和字体大小一致,而span等标签的下边缘会和字体的基线对齐,故需设置一个往下的偏移比例,来纠正视觉上的未对齐效果 */ outline: none; fill: currentColor; /* 定义元素的颜色,currentColor是一个变量,这个变量的值就表示当前元素的color值,如果当前元素未设置color值,则从父元素继承 */ } </style>使用:在
src/assets/icons文件夹中存在一个从 iconfont 上下载的menu.svg图标。vue<template> <svg-icon icon-class="menu"/> </template> <script setup lang="ts"> import SvgIcon from '@/components/SvgIcon/index.vue'; </script>
NProgress 进度条集成
安装 NProgress 进度条组件:
shpnpm i nprogress pnpm i -D @types/nprogress在
src/utils目录中新建一个nprogress.ts文件:tsimport NProgress from "nprogress"; import "nprogress/nprogress.css"; // 进度条 NProgress.configure({ // 动画方式 easing: "ease", // 递增进度条的速度 speed: 500, // 是否显示加载ico showSpinner: false, // 自动递增间隔 trickleSpeed: 200, // 初始化时的最小百分比 minimum: 0.3, }); export default NProgress;
Animate.css 动画库集成
安装 Animate.css 动画库:
pnpm i animate.css在
main.ts文件中引入 Animate.css 动画库:import 'animate.css'基础使用:将
animate__animated类添加到元素中,同时添加任何动画名称(不要忘记animate__前缀!)html<h1 class="animate__animated animate__bounce">An animated element</h1> <transition enter-active-class="animate__animated animate__fadeInLeft"></transition>
环境变量与模式
在项目根目录下创建
.env.development文件:# 变量必须以 VITE_ 为前缀才能暴露给外部读取 ## 开发环境 NODE_ENV='development' # 代理前缀 VITE_APP_BASE_API = '/api' # 接口地址 VITE_APP_API_URL=http://localhost:8800 # 请求超时时间 VITE_APP_API_TIMEOUT=50000TypeScript 的智能提示:在
env.d.ts文件中按下面这样增加ImportMetaEnv的定义:ts/// <reference types="vite/client" /> interface ImportMetaEnv { /** API 基础路径(代理前缀) */ readonly VITE_APP_BASE_API: string /** API 地址 */ readonly VITE_APP_API_URL: string /** 请求超时时间 */ readonly VITE_APP_API_TIMEOUT: number // 更多环境变量... }interface ImportMeta { readonly env: ImportMetaEnv }
VueUse 集成
VueUse 是基于 Vue 组合式 API 的实用工具集,如 useStorage 函数可以实现状态持久化存储(localStorage|SessionStorage);useFullscreen 函数可以非常方便地实现全屏模式,等等。
安装
pnpm i @vueuse/core插件通过
unplugin-auto-import插件实现自动导入 VueUse 相关函数,修改vite.config.ts配置文件tsexport default defineConfig({ plugins: [ AutoImport({ resolvers: [ // 自动导入 Element Plus 相关函数,如:ElMessage, ElMessageBox... (带样式) ElementPlusResolver(), // 自动导入图标组件 IconsResolver() ], // 自动导入 Vue 相关函数,如:ref, reactive, toRef 等 // 自动导入 VueRouter 相关函数,如:useRouter 等 // 自动导入 Pinia 相关函数,如:createPinia,defineStore,storeToRefs 等 // 自动导入 @vueuse/core 相关函数,如:useStorage、useTitle 等 // 参考自: https://github.com/sxzz/element-plus-best-practices/blob/main/vite.config.ts imports: ['vue', 'vue-router', 'pinia', '@vueuse/core'], // 是否在 vue 模板中自动导入 vueTemplate: true, // 指定自动导入函数TS类型声明文件路径,为true时在项目根目录自动创建,为false时关闭自动生成 dts: resolve(pathSrc, 'typings', 'auto-imports.d.ts') }), // ... ] })
登录功能
用户登录流程:跳转到登录页,填写登录表单,等表单校验通过之后就可以向后端发起登录请求,将表单中的用户名和密码作为请求参数传递给后端,登录成功之后将后端返回的 token 进行持久化存储,然后跳转到首页。
axios 二次封装
- 安装 axios:
pnpm i axios - 在
src目录下创建一个utils/request.ts文件,用于创建 axios 实例以及添加请求和响应拦截器。 - 对于后端返回的数据定义一个统一的响应结果类型
Result进行接收。
import type { AxiosRequestConfig } from 'axios'
import axios from 'axios'
import router from '@/router'
import { useUserStoreHook } from '@/stores'

// 创建 axios 实例
const service = axios.create({
  baseURL: import.meta.env.VITE_APP_BASE_API,
  timeout: import.meta.env.VITE_APP_API_TIMEOUT,
  headers: { 'Content-Type': 'application/json;charset=utf-8' }
})

// 添加请求拦截器
service.interceptors.request.use(
  function (config) {
    const token = useUserStoreHook().token
    if (token) {
      config.headers['Authorization'] = `Bearer ${token}`
    }
    return config
  },
  function (error) {
    return Promise.reject(error)
  }
)

const defaultErrorMessage = '发生了一些错误,请联系管理员'
// 添加响应拦截器
service.interceptors.response.use(
  function (response) {
    // 统一处理接口响应错误,如 token 过期无效,服务端异常等
    const { code, msg } = response.data
    if (code === '00000') {
      return response.data
    }
    // 响应数据为二进制流处理(Excel导出)
    if (response.data instanceof ArrayBuffer) {
      return response
    }
    ElMessage.error(msg || defaultErrorMessage)
    return Promise.reject(msg || defaultErrorMessage)
  },
  async function (error) {
    if (error.response?.data) {
      const { code, msg } = error.response.data
      // token 过期,重新登录
      if (code === 'A0230') {
        const res = await ElMessageBox.confirm('当前页面已失效,请重新登录', '提示', {
          confirmButtonText: '确定',
          cancelButtonText: '取消'
        })
        if (res === 'confirm') {
          // 清除 token & 跳转到登录页面 & 刷新页面
          await useUserStoreHook().resetToken()
          await router.replace({ path: '/login' })
          location.reload()
        }
      } else {
        ElMessage.error(msg || defaultErrorMessage)
      }
      return Promise.reject(msg || defaultErrorMessage)
    }
    ElMessage.error(defaultErrorMessage)
    return Promise.reject(error.message)
  }
)

const request = <T>(config: AxiosRequestConfig) => {
  return new Promise<T>((resolve, reject) => {
    service<T, Result<T>>(config)
      .then((res) => {
        resolve(res.data)
      })
      .catch((err) => {
        reject(err)
      })
  })
}

const get = <T>(url: string, params?: any, config?: AxiosRequestConfig) => {
  return request<T>({
    url,
    method: 'GET',
    params,
    ...config
  })
}

const post = <T>(url: string, data?: any, config?: AxiosRequestConfig) => {
  return request<T>({
    url,
    method: 'POST',
    data,
    ...config
  })
}

export { request, get, post }
export default servicedeclare global {
/**
* 统一响应结构体
*/
interface Result<T> {
/**
* 响应码
*/
code: string
/**
* 响应消息
*/
msg: string
/**
* 响应数据
*/
data: T
}
}
export {}登录接口
定义用户登录请求参数和响应结果类型,并且利用二次封装的 axios 发送登录请求给后端。
import { post } from '@/utils/request'
import type { LoginRequest, LoginResult } from '@/api/auth/types'

/**
 * 用户登录
 * @param loginRequest 用户登录请求参数
 */
export const loginApi = (loginRequest: LoginRequest) => {
  return post<LoginResult>('/auth/login', loginRequest)
}/**
* 用户登录请求参数
*/
export interface LoginRequest {
/**
* 用户名
*/
username: string
/**
* 密码
*/
password: string
}
/**
* 用户登录响应
*/
export interface LoginResult {
/**
* 访问token
*/
accessToken: string
}pinia 状态存储
为了记住用户登录成功时后端返回的访问令牌 token,咱们需要创建一个专门用于存储用户状态信息的 userStore。
- 在
src/stores目录下创建一个modules文件夹,以后不同模块功能的状态存储文件都放在该文件夹下。 - 在
src/stores目录下新建一个index.ts文件,- 创建并导出 pinia 实例
- 定义并导出全局注册 pinia 实例的函数,
- 集中统一导出各个模块
- 在
main.ts文件中全局注册 pinia
import type { LoginRequest } from '@/api/auth/types'
import { loginApi } from '@/api/auth'
import { store } from '@/stores'

export const useUserStore = defineStore('user', () => {
  // 使用 VueUse 中的 useStorage 函数将 token 保存到 localStorage 中
  const token = useStorage('token', '')

  /**
   * 登录
   * @param loginRequest 用户登录请求参数
   */
  const login = (loginRequest: LoginRequest) => {
    return new Promise<void>((resolve, reject) => {
      loginApi(loginRequest)
        .then(({ accessToken }) => {
          token.value = accessToken
          resolve()
        })
        .catch((err) => {
          reject(err)
        })
    })
  }

  /**
   * 清除token
   */
  const resetToken = () => {
    return new Promise<void>((resolve) => {
      token.value = ''
      resolve()
    })
  }

  return { token, login, resetToken }
})

// 非setup
export const useUserStoreHook = () => {
  return useUserStore(store)
}import type { App } from 'vue'
const store = createPinia()
// 全局注册 store
export function setupStore(app: App<Element>) {
app.use(store)
}
export * from './modules/user'
export { store }import '@/styles/index.scss'
import 'normalize.css/normalize.css'
import App from './App.vue'
import router from '@/router'
import { setupStore } from '@/stores'
const app = createApp(App)
app.use(createPinia())
// 全局注册store状态管理
setupStore(app)
app.use(router).mount('#app')登录&首页组件
- 创建登录组件并进行样式完善
- 创建首页组件
- 路由配置
<script lang="ts" setup>
import type { FormInstance, FormRules } from 'element-plus'
import type { LoginRequest } from '@/api/auth/types'
import { useUserStore } from '@/stores'
import type { LocationQuery, LocationQueryValue } from 'vue-router'

const loginFormRef = ref<FormInstance>()
const loginForm = reactive<LoginRequest>({
  username: 'admin',
  password: '123456'
})
const rules = reactive<FormRules<typeof loginForm>>({
  username: [{ required: true, message: '用户名不能为空', trigger: 'blur' }],
  password: [{ required: true, message: '密码不能为空', trigger: 'blur' }]
})
const router = useRouter()
const route = useRoute()
const loading = ref(false)
const handleLogin = () => {
  loginFormRef.value?.validate(async (valid: boolean) => {
    if (!valid) return false
    loading.value = true
    useUserStore()
      .login(loginForm)
      .then(async () => {
        ElMessage.success('登录成功,欢迎回来!')
        const query: LocationQuery = route.query
        const redirect = (query.redirect as LocationQueryValue) ?? '/'
        await router.push({ path: redirect })
      })
      .finally(() => (loading.value = false))
  })
}
</script>

<template>
  <div
    class="h-screen w-screen flex justify-center items-center bg-gray-100 bg-[url('@/assets/images/background.svg')]"
  >
    <div class="login-wrapper w-96 p-2 m-4 bg-white shadow-xl rounded flex flex-col items-center">
      <div class="title font-bold text-xl m-2">simple 后台管理系统</div>
      <div class="p-6 w-full">
        <el-form ref="loginFormRef" :model="loginForm" :rules="rules">
          <el-form-item prop="username">
            <el-input v-model.trim="loginForm.username" placeholder="请输入用户名">
              <template #prefix>
                <i-ep-user />
              </template>
            </el-input>
          </el-form-item>
          <el-form-item prop="password">
            <el-input
              v-model.trim="loginForm.password"
              placeholder="请输入密码"
              show-password
              type="password"
            >
              <template #prefix>
                <i-ep-lock />
              </template>
            </el-input>
          </el-form-item>
        </el-form>
        <el-button :loading="loading" class="w-full mt-2" type="primary" @click="handleLogin">
          登录
        </el-button>
      </div>
    </div>
  </div>
</template><template>首页</template>import type { RouteRecordRaw } from 'vue-router'
import { createRouter, createWebHistory } from 'vue-router'
import AppLayout from '@/layout/AppLayout.vue'
// 静态路由
const constantRoutes: RouteRecordRaw[] = [
{ path: '/login', name: 'login', component: () => import('@/views/login/index.vue') },
{ path: '/', name: 'home', component: () => import('@/views/home/index.vue') }
]
const router = createRouter({
// 路由模式
history: createWebHashHistory(import.meta.env.BASE_URL),
// 路由规则,
routes: constantRoutes,
// 刷新时,滚动条位置还原
scrollBehavior: () => ({ left: 0, top: 0 })
})
export default router反向代理解决跨域
浏览器同源策略: 协议、域名和端口都相同是同源,浏览器会限制非同源请求读取响应结果。
本地开发环境通过 vite 配置反向代理解决浏览器跨域问题,生产环境则是通过 nginx 配置反向代理。
import { resolve } from 'path'

import { ConfigEnv, defineConfig, loadEnv, UserConfig } from 'vite'
import vue from '@vitejs/plugin-vue'
import vueJsx from '@vitejs/plugin-vue-jsx'
import VueDevTools from 'vite-plugin-vue-devtools'
import AutoImport from 'unplugin-auto-import/vite'
import Components from 'unplugin-vue-components/vite'
import { ElementPlusResolver } from 'unplugin-vue-components/resolvers'
import Icons from 'unplugin-icons/vite'
import IconsResolver from 'unplugin-icons/resolver'
import { createSvgIconsPlugin } from 'vite-plugin-svg-icons'

const pathSrc = resolve(__dirname, 'src')

// https://vitejs.dev/config/
export default defineConfig(({ mode }: ConfigEnv): UserConfig => {
  const env = loadEnv(mode, process.cwd())
  return {
    resolve: {
      alias: {
        '@': pathSrc
      }
    },
    plugins: [
      vue(),
      vueJsx(),
      VueDevTools(),
      AutoImport({
        resolvers: [
          // 自动导入 Element Plus 相关函数,如:ElMessage, ElMessageBox... (带样式)
          ElementPlusResolver(),
          // 自动导入图标组件
          IconsResolver()
        ],
        // 自动导入 Vue 相关函数,如:ref, reactive, toRef 等
        // 自动导入 VueRouter 相关函数,如:useRouter 等
        // 自动导入 Pinia 相关函数,如:createPinia,defineStore,storeToRefs 等
        // 自动导入 @vueuse/core 相关函数,如:useStorage、useTitle 等
        // 参考自: https://github.com/sxzz/element-plus-best-practices/blob/main/vite.config.ts
        imports: ['vue', 'vue-router', 'pinia', '@vueuse/core'],
        // 是否在 vue 模板中自动导入
        vueTemplate: true,
        // 指定自动导入函数TS类型声明文件路径,为true时在项目根目录自动创建,为false时关闭自动生成
        dts: resolve(pathSrc, 'typings', 'auto-imports.d.ts')
      }),
      Components({
        resolvers: [
          // 自动导入 Element Plus 组件
          ElementPlusResolver(),
          // 自动注册图标组件
          IconsResolver({
            // 只启用 element-plus 图标集,其他图标库 https://icon-sets.iconify.design/
            enabledCollections: ['ep']
          })
        ],
        // 组件名称包含目录,防止同名组件冲突
        // directoryAsNamespace: true,
        // 指定自定义组件位置(默认:src/components)
        dirs: ['src/components', 'src/**/components'],
        // 指定自动导入组件TS类型声明文件路径,为true时在项目根目录自动创建,为false时关闭自动生成
        dts: resolve(pathSrc, 'typings', 'components.d.ts')
        // dts: false
      }),
      Icons({
        // 自动安装图标库
        autoInstall: true
      }),
      createSvgIconsPlugin({
        // 指定需要缓存的图标文件夹
        iconDirs: [resolve(pathSrc, 'assets/icons')],
        // 指定symbolId格式
        symbolId: 'icon-[dir]-[name]'
      })
    ],
    server: {
      proxy: {
        /** 代理前缀为 /api 的请求  */
        [env.VITE_APP_BASE_API]: {
          changeOrigin: true,
          // 接口地址
          target: env.VITE_APP_API_URL,
          rewrite: (path) => path.replace(new RegExp('^' + env.VITE_APP_BASE_API), '')
        }
      }
    }
  }
})动态权限路由
Important
需要事先将用于显示的页面组件创建出来并放置在 src/views 目录下,如用户管理、角色管理、菜单管理等页面组件。
全局导航守卫中的主要流程:
判断用户是否已经登录?
如果已登录的话,判断将要访问的页面是不是登录页面?
如果是登录页面的话,则直接跳转到首页(因为用户已经登录,无需再次登录);
如果不是登录页面的话,则需要根据
hasDynamicRoutes变量判断是否已经从后端获取到动态路由并添加到 router 实例中?Note
当用户刷新页面时:
hasDynamicRoutes变量初始化成默认值false- Vue、Pinia、VueRouter 会重新实例化,从而导致 pinia 中存储的状态数据全部丢失(除访问令牌 token 之外,因为 token 已经进行持久化存储,所以重新实例化时 token 的初始值会从 localStorage 中读取),VueRouter 中已经添加的动态路由也会丢失,因此需要再重新请求一次后端,将用户的登录信息保存起来,将动态路由列表根据用户角色过滤转换之后保存起来并添加到 router 实例中。
如此可以解决用户刷新白屏的问题!
- 如果该变量为
true的话,则说明已经从后端获取到动态路由并添加到 router 实例中,可以直接放行; - 如果该变量为
false的话,则需要进行以下两步:- 发送获取登录用户详情的请求,将返回的当前登录用户详情信息,如用户名、昵称、角色列表、权限列表等保存起来;
- 发送获取路由列表的请求,将返回的动态路由列表根据当前登录用户的角色过滤转换之后保存起来,并且利用
addRoute方法将获取到的动态路由添加到 router 实例中
如果未登录的话,则判断要跳转的页面是否在白名单中?
- 如果在白名单(如
/login登录页面)中,则直接放行; - 如果不在白名单中,则重定向到登录页面,并将要访问的页面路径作为参数,登录成功后自动跳转回原页面
- 如果在白名单(如
import router from '@/router'
import NProgress from '@/utils/nprogress'
import type { RouteRecordRaw } from 'vue-router'
import { usePermissionStore, useUserStore } from '@/stores'

/**
 * 用于判断是否已拉取完用户信息和动态路由的标识,当用户刷新页面时,该标识会被重置为 false,在下一次访问路由时,会重新获取用户信息和动态路由
 */
let hasDynamicRoutes = false
/**
 * 参考花裤衩大佬的权限控制方案:https://github.com/PanJiaChen/vue-element-admin/blob/master/src/permission.js
 * 这一块有两个坑需要注意:
 * 1. 当用户刷新的时候,vue 会重新实例化 => vue-router 中添加的动态路由和 pinia 中存储的状态数据都会被清除掉,因此需要在刷新页面时重新获取用户信息和动态路由,并重新添加到路由表中
 * 2. vue-router 的路由模式需要设置为 hash history 模式,否则在手动输入 URL 时,页面会重新刷新,导致出现情况1中的问题,又重新走一遍发请求获取用户信息和添加动态路由的流程
 */
export const setupPermission = () => {
  // 白名单路由
  const whiteList = ['/login']

  router.beforeEach(async (to, from) => {
    NProgress.start()
    const { token, resetToken, getUserInfo } = useUserStore()
    if (token) {
      if (to.path === '/login') {
        // 在已登录的状态下,如果访问的是登录页面,则直接重定向到主页
        NProgress.done()
        return '/'
      } else {
        if (hasDynamicRoutes) {
          if (to.matched.length === 0) {
            // 如果访问的路由不存在,则重定向到404页面
            return from.name ? { name: from.name } : '/404'
          } else {
            // 用户已登录 && 已拉取完用户信息 && 访问的路由存在,则直接放行
            return true
          }
        } else {
          try {
            // 获取当前登录用户信息
            const { roles } = await getUserInfo()
            // 获取用户可访问的路由表
            const accessedRoutes = await usePermissionStore().generateRoutes(roles)
            // 动态添加可访问路由表
            accessedRoutes.forEach((route: RouteRecordRaw) => {
              router.addRoute(route)
            })
            hasDynamicRoutes = true
            // hack方法,路由添加进去之后不会马上生效,因此需要再次加载当前路由,即重新执行一遍全局前置守卫
            // 因为第一次进入全局前置守卫时路由表中还没有此时添加的动态路由,所以需要在添加完路由后重新加载当前路由以触发全局前置守卫
            return { ...to, replace: true }
          } catch (error) {
            // 如果拉取用户信息失败或动态路由失败,则清除token并重定向到登录页面
            await resetToken()
            NProgress.done()
            return `/login?redirect=${to.path}`
          }
        }
      }
    } else {
      // 在未登录状态下,如果访问的路由在白名单中,则直接放行
      if (whiteList.indexOf(to.path) !== -1) {
        return true
      } else {
        // 否则重定向到登录页面,并将要访问的页面路径作为参数,登录成功后自动跳转回原页面
        NProgress.done()
        return `/login?redirect=${to.path}`
      }
    }
  })

  router.afterEach(() => {
    NProgress.done()
  })
}export * from './modules/permission'import { getUserInfoApi } from '@/api/user'
import type { UserInfo } from '@/api/user/types'
import type { LoginRequest } from '@/api/auth/types'
import { loginApi, logoutApi } from '@/api/auth'
import { store } from '@/stores'
export const useUserStore = defineStore('user', () => {
// 使用 VueUse 中的 useStorage 函数将 token 保存到 localStorage 中
const token = useStorage('token', '')
const userInfo = ref<UserInfo>({
roles: [],
permissions: []
})
/**
* 登录
* @param loginRequest 用户登录请求参数
*/
const login = (loginRequest: LoginRequest) => {
return new Promise<void>((resolve, reject) => {
loginApi(loginRequest)
.then(({ accessToken }) => {
token.value = accessToken
resolve()
})
.catch((err) => {
reject(err)
})
})
}
/**
* 清除token
*/
const resetToken = () => {
return new Promise<void>((resolve) => {
token.value = ''
resolve()
})
}
/**
* 获取当前登录用户信息
*/
const getUserInfo = () => {
return new Promise<UserInfo>((resolve, reject) => {
getUserInfoApi()
.then((res) => {
if (!res) {
reject('Verification failed, please Login again.')
return
}
if (!res.roles || res.roles.length <= 0) {
reject('getUserInfo: roles must be a non-null array!')
return
}
userInfo.value = res
resolve(res)
})
.catch((err) => {
reject(err)
})
})
}
return { token, userInfo, login, resetToken, getUserInfo }
})
// 非setup
export const useUserStoreHook = () => {
return useUserStore(store)
}import { get } from '@/utils/request'
import type { UserInfo } from '@/api/user/types'
/**
* 获取当前登录用户信息(包括用户昵称、头像、角色和权限集合等)
*/
export const getUserInfoApi = () => {
return get<UserInfo>('/sys/user/me')
}/**
* 登录用户信息
*/
export type UserInfo = {
/** 用户ID(可选)*/
userId?: number //
/** 用户名(可选)*/
username?: string
/** 用户昵称(可选)*/
nickname?: string
/** 用户头像(可选)*/
avatar?: string
/** 用户角色列表 */
roles: string[]
/** 用户权限列表 */
permissions: string[]
}import type { RouteRecordRaw } from 'vue-router'
import { constantRoutes } from '@/router'
import { listRoutesApi } from '@/api/menu'
import { store } from '@/stores'
const Layout = () => import('@/layout/index.vue')
const modules = import.meta.glob('../../views/**/*.vue')
/**
* 根据用户角色列表判断是否有权限访问该路由
* @param roles
* @param route
*/
const hasPermission = (roles: string[], route: RouteRecordRaw): boolean => {
if (route.meta && route.meta.roles) {
// 角色【超级管理员】拥有所有权限,忽略校验
if (roles.includes('ROOT')) {
return true
}
return roles.some((role) => {
if (route.meta?.roles) {
return route.meta.roles.includes(role)
}
})
}
return false
}
/**
* 根据用户角色递归过滤出有权限访问的路由
* @param dynamicRoutes 接口返回的动态路由列表
* @param roles 角色列表
*/
const filterDynamicRoutes = (
dynamicRoutes: RouteRecordRaw[],
roles: string[]
): RouteRecordRaw[] => {
const accessedRoutes: RouteRecordRaw[] = []
dynamicRoutes.forEach((route) => {
// 使用 ES6 的扩展运算符复制一份 route 对象,防止修改原对象
const tempRoute = { ...route }
if (!tempRoute.name) {
tempRoute.name = tempRoute.path
}
if (hasPermission(roles, tempRoute)) {
// 后端返回的路由中,component 属性是字符串,需要转换成 () => import() 形式
if (tempRoute.component?.toString() === 'Layout') {
tempRoute.component = Layout
} else {
const component = modules[`../../views/${tempRoute.component}.vue`]
if (component) {
tempRoute.component = component
} else {
tempRoute.component = modules[`../../views/error-page/404.vue`]
}
}
if (tempRoute.children) {
tempRoute.children = filterDynamicRoutes(tempRoute.children, roles)
}
accessedRoutes.push(tempRoute)
}
})
return accessedRoutes
}
export const usePermissionStore = defineStore('permission', () => {
/**
* 路由列表 = 静态路由 + 动态路由
*/
const routes = ref<RouteRecordRaw[]>([])
/**
* 添加动态路由
* @param dynamicRoutes 动态路由
*/
const addRoutes = (dynamicRoutes: RouteRecordRaw[]) => {
routes.value = constantRoutes.concat(dynamicRoutes)
}
/**
* 生成动态路由
* @param roles 角色列表
*/
const generateRoutes = (roles: string[]) => {
return new Promise<RouteRecordRaw[]>((resolve, reject) => {
listRoutesApi()
.then((dynamicRoutes) => {
const accessedRoutes = filterDynamicRoutes(dynamicRoutes, roles)
addRoutes(accessedRoutes)
resolve(accessedRoutes)
})
.catch((err) => {
reject(err)
})
})
}
return { routes, addRoutes, generateRoutes }
})
// 非setup
export const usePermissionStoreHook = () => {
return usePermissionStore(store)
}import type { App } from 'vue'
const store = createPinia()
// 全局注册 store
export function setupStore(app: App<Element>) {
app.use(store)
}
export * from './modules/user'
export * from './modules/permission'
export { store }import '@/styles/index.scss'
import 'normalize.css/normalize.css'
import App from './App.vue'
import router from '@/router'
import { setupStore } from '@/stores'
import { setupPermission } from '@/plugins'
// 本地SVG图标
import 'virtual:svg-icons-register'
// 全局动画库
import 'animate.css'
const app = createApp(App)
// 全局注册store状态管理
setupStore(app)
// 注册动态路由
setupPermission()
app.use(router).mount('#app')import { get } from '@/utils/request'
import type { RouteRecordRaw } from 'vue-router'
/**
* 获取路由列表
*/
export const listRoutesApi = () => {
return get<RouteRecordRaw[]>('/sys/menu/routes')
}import 'vue-router'
declare module 'vue-router' {
// https://router.vuejs.org/zh/guide/advanced/meta.html#typescript
// 可以通过扩展 RouteMeta 接口来输入 meta 字段
interface RouteMeta {
/** 菜单名称 */
title?: string
/** 菜单图标 */
icon?: string
/** 菜单是否隐藏 */
hidden?: boolean
/** 拥有该菜单权限的角色编码集合 */
roles?: string[]
/** 【菜单】是否缓存页面 */
keepAlive?: boolean
/** 【目录】只有一个子菜单时是否始终显示 */
alwaysShow?: boolean
/** 是否固定页签 */
affix?: boolean
/** 是否在面包屑上隐藏 */
breadcrumb?: boolean
}
}
export {}<script lang="ts" setup>
defineOptions({
name: 'User'
})
const count = ref(0)
</script>
<template>
<div class="text-2xl mb-4">用户管理</div>
<div class="flex items-center">
<div class="mr-4">count: {{ count }}</div>
<el-button-group>
<el-button size="small" type="primary" @click="count++">
<el-icon>
<IEpPlus />
</el-icon>
</el-button>
<el-button size="small" type="primary" @click="count--">
<el-icon>
<IEpMinus />
</el-icon>
</el-button>
</el-button-group>
</div>
</template>
<style lang="scss" scoped></style><script lang="ts" setup>
defineOptions({
name: 'Role'
})
const message = ref('')
</script>
<template>
<div class="text-2xl mb-4">角色管理</div>
<div class="flex items-center">
<span class="mr-5">message: {{ message }}</span>
<el-input v-model="message" class="!w-[250px]" placeholder="请输入内容" />
</div>
</template>
<style lang="scss" scoped></style><script lang="ts" setup>
defineOptions({
// eslint-disable-next-line vue/no-reserved-component-names
name: 'Menu'
})
</script>
<template>菜单管理</template>
<style lang="scss" scoped></style>整体布局
借助 ElementPlus 的 Container 布局容器实现布局,创建 Layout 组件作为专门的布局组件,如下所示:
<script lang="ts" setup>
defineOptions({
  name: 'Layout'
})
</script>

<template>
  <el-container class="w-screen h-screen">
    <el-aside class="bg-[#344157]" width="200px">
      <Sidebar />
    </el-aside>
    <el-container>
      <el-header class="!px-0" height="50px">
        <el-row>
  				<NavBar />
  			</el-row>
      </el-header>
      <el-main class="bg-[#eef5ff]">
        <AppMain />
      </el-main>
    </el-container>
  </el-container>
</template>

<style lang="scss" scoped></style><script lang="ts" setup>
defineOptions({
name: 'Sidebar'
})
</script>
<template>Aside</template>
<style lang="scss" scoped></style><script lang="ts" setup>
defineOptions({
name: 'NavBar'
})
</script>
<template>
<!-- 顶部导航栏 -->
<div class="h-full w-full bg-white flex items-center justify-between">Header</div>
</template>
<style lang="scss" scoped></style><script lang="ts" setup>
defineOptions({
name: 'AppMain'
})
const cachedViews = ref<string[]>([])
</script>
<template>
<section class="w-full h-full">
<router-view>
<template #default="{ Component, route }">
<keep-alive :include="cachedViews">
<component :is="Component" :key="route.path" />
</keep-alive>
</template>
</router-view>
</section>
</template>
<style lang="scss" scoped></style><script lang="ts" setup></script>
<template>
<div>
<el-button>Default</el-button>
<el-button type="primary">Primary</el-button>
<el-button type="success">Success</el-button>
<el-button type="info">Info</el-button>
<el-button type="warning">Warning</el-button>
<el-button type="danger">Danger</el-button>
</div>
<div class="mt-4 flex items-center">
<i-ep-user />
<el-icon :size="50" color="#1976D2">
<i-ep-edit />
</el-icon>
<svg-icon icon-class="system" size="50" />
<svg-icon icon-class="user" size="50" />
<svg-icon icon-class="role" size="50" />
<svg-icon icon-class="menu" size="50" />
</div>
</template>
<style lang="scss" scoped></style>呈现效果如下所示: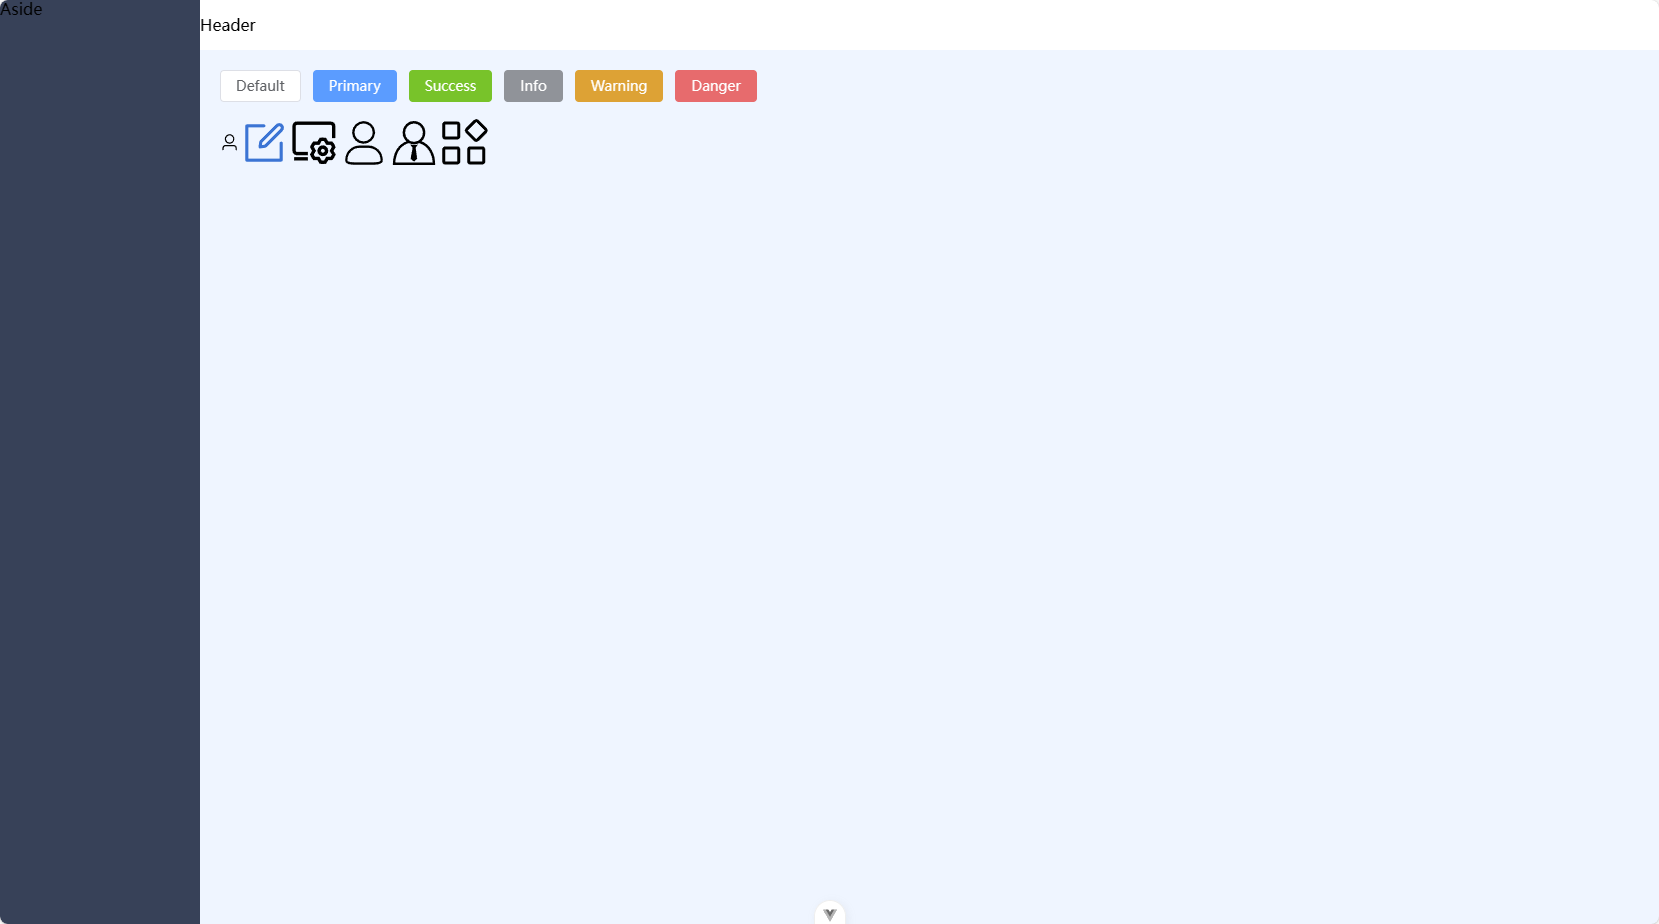
侧边栏
通过当前用户所拥有的全部路由 = 静态路由 + 动态路由(数据已经在全局导航守卫的逻辑执行过程中保存到 permissionStore)=> 侧边栏中的目录和菜单项,并且对于目录而言,还需要进行递归处理。
<script lang="ts" setup>
import { useAppStore } from '@/stores'

defineOptions({
  name: 'Layout'
})

const appStore = useAppStore()
</script>

<template>
  <el-container class="w-screen h-screen">
    <el-aside
      :width="appStore.sidebar.opened ? '200px' : '64px'"
      class="bg-[#344157] transition-[width] duration-[0.3s] ease-in-out"
    >
      <Sidebar />
    </el-aside>
    <el-container>
      <el-header class="!px-0" height="50px">
        <el-row>
  				<NavBar />
  			</el-row>
      </el-header>
      <el-main class="bg-[#eef5ff]">
        <AppMain />
      </el-main>
    </el-container>
  </el-container>
</template>

<style lang="scss" scoped></style><script lang="ts" setup>
import { usePermissionStore } from '@/stores'
defineOptions({
name: 'Sidebar'
})
const permissionStore = usePermissionStore()
</script>
<template>
<SidebarLogo />
<SidebarMenu :menu-list="permissionStore.routes" base-path="" />
</template>
<style lang="scss" scoped></style><script lang="ts" setup>
import { useAppStore } from '@/stores'
const appStore = useAppStore()
const collapsed = computed(() => !appStore.sidebar.opened)
</script>
<template>
<div class="w-full h-[50px] bg-[#2f3749]">
<transition enter-active-class="animate__animated animate__fadeInLeft">
<router-link v-if="collapsed" class="w-full h-full flex items-center justify-center" to="/">
<img alt="logo" class="w-[20px] h-[20px]" src="@/assets/logo.svg" />
</router-link>
<router-link v-else class="w-full h-full flex items-center justify-center" to="/">
<img alt="logo" class="w-[20px] h-[20px]" src="@/assets/logo.svg" />
<span class="flex-shrink-0 ml-[10px] text-[16px] font-bold text-white">simple-admin</span>
</router-link>
</transition>
</div>
</template>
<style lang="scss" scoped></style><script lang="ts" setup>
import { useAppStore } from '@/stores'
import type { RouteRecordRaw } from 'vue-router'
import { resolvePath } from '@/utils'
const appStore = useAppStore()
const route = useRoute()
withDefaults(
defineProps<{
menuList: RouteRecordRaw[]
basePath: string
}>(),
{
menuList: () => []
}
)
</script>
<template>
<div class="sidebar-menu">
<el-scrollbar height="calc(100vh - 50px)">
<el-menu
:collapse="!appStore.sidebar.opened"
:collapse-transition="false"
:default-active="route.path"
:unique-opened="false"
background-color="#304156"
text-color="#bfcbd9"
>
<SidebarMenuItem
v-for="item in menuList"
:key="item.path"
:basePath="resolvePath(item.path, basePath)"
:item="item"
/>
</el-menu>
</el-scrollbar>
</div>
</template>
<style lang="scss" scoped>
.el-menu {
border-right: none;
}
</style><script lang="ts" setup>
import type { RouteRecordRaw } from 'vue-router'
import { resolvePath } from '@/utils'
const props = defineProps<{
/**
* 路由(eg:user)
*/
item: RouteRecordRaw
/**
* 父层级完整路由路径(eg:/system)
*/
basePath: string
}>()
const onlyOneChild = ref<RouteRecordRaw & { noShowingChildren?: boolean }>()
/**
* 判断当前路由是否只具有一个显示的子路由
* 1. 如果当前路由下只有一个显示的子路由,则返回true
* 2. 如果当前路由下没有显示的子路由,则显示当前路由并返回true
* 3. 如果当前路由下有多个显示的子路由,则返回false
* @param current 当前路由
* @returns 是否只具有一个显示的子路由
*/
const hasOneShowingChild = computed(() => {
const children = props.item.children || []
// 显示的子路由集合
const showingChildren = children.filter((route) => {
if (route.meta?.hidden) {
// 过滤不显示的子路由
return false
} else {
// 用于存储当前路由的单个显示子路由,如果存在多个显示子路由,则该变量不会被用到
onlyOneChild.value = route
return true
}
})
// 如果当前路由下只有一个显示的子路由,则返回true
if (showingChildren.length == 1) {
return true
}
// 如果当前路由下没有显示的子路由,则显示当前路由
if (showingChildren.length == 0) {
onlyOneChild.value = { ...props.item, path: '', noShowingChildren: true }
return true
}
return false
})
</script>
<template>
<template v-if="!item.meta || !item.meta.hidden">
<!-- 只有一个显示的子路由 || 没有子路由的菜单项 -->
<template
v-if="
hasOneShowingChild &&
(!onlyOneChild?.children || onlyOneChild.noShowingChildren) &&
!item.meta?.alwaysShow
"
>
<AppLink v-if="onlyOneChild?.meta" :to="resolvePath(onlyOneChild.path, basePath)">
<el-menu-item :index="resolvePath(onlyOneChild.path, basePath)">
<el-icon>
<template v-if="onlyOneChild.meta.icon && onlyOneChild.meta.icon.startsWith('el-icon')">
<component :is="onlyOneChild.meta.icon.replace('el-icon-', '')" />
</template>
<svg-icon v-else-if="onlyOneChild.meta.icon" :icon-class="onlyOneChild.meta.icon" />
<svg-icon v-else icon-class="menu" />
</el-icon>
<template #title>{{ onlyOneChild.meta.title }}</template>
</el-menu-item>
</AppLink>
</template>
<!-- 显示具有多个子路由的父菜单项 -->
<el-sub-menu v-else :index="resolvePath(item.path, basePath)" teleported>
<template #title>
<el-icon>
<template v-if="item.meta?.icon && item.meta.icon.startsWith('el-icon')">
<component :is="item.meta.icon.replace('el-icon-', '')" />
</template>
<svg-icon v-else-if="item.meta?.icon" :icon-class="item.meta.icon" />
<svg-icon v-else icon-class="menu" />
</el-icon>
<span>{{ item.meta?.title }}</span>
</template>
<SidebarMenuItem
v-for="child in item.children"
:key="child.path"
:base-path="resolvePath(child.path, basePath)"
:item="child"
/>
</el-sub-menu>
</template>
</template>
<style lang="scss" scoped></style><script lang="ts" setup>
import { isExternal } from '@/utils'
defineOptions({
name: 'AppLink',
inheritAttrs: false
})
const props = defineProps({
to: {
type: String,
required: true
}
})
const isExternalLink = computed(() => isExternal(props.to))
const type = computed(() => {
return isExternalLink.value ? 'a' : 'router-link'
})
const linkProps = (to: string) => {
return isExternalLink.value ? { href: to, target: '_blank', rel: 'noopener noreferrer' } : { to }
}
</script>
<template>
<component :is="type" v-bind="linkProps(to)">
<slot></slot>
</component>
</template>
<style lang="scss" scoped></style>import path from 'path-browserify'
/**
* 检查路径是否为外部链接
* @param path 要检查的路径
* @returns 如果是外部链接,则为 true,否则为 false
*/
export const isExternal = (path: string) => {
return /^(https?:|http?:|mailto:|tel:)/.test(path)
}
/**
* 解析路由路径(相对路径 -> 绝对路径)
* @param routePath 路由路径
* @param basePath 父路由路径
* @returns 解析后的绝对路由路径
*/
export const resolvePath = (routePath: string, basePath: string) => {
if (isExternal(routePath)) {
return routePath
}
if (isExternal(basePath)) {
return basePath
}
// 完整路由路径(/system/user)= 父路由路径(/system) + 当前路由路径(user)
return path.resolve(basePath, routePath)
}import { store } from '@/stores'
import { SidebarStatus } from '@/enums/SidebarStatus'
export const useAppStore = defineStore('app', () => {
const sidebarStatus = useStorage('sidebarStatus', SidebarStatus.OPENED)
const sidebar = reactive({
opened: sidebarStatus.value === SidebarStatus.OPENED,
withoutAnimation: false
})
const toggleSidebar = () => {
sidebar.opened = !sidebar.opened
sidebarStatus.value = sidebar.opened ? SidebarStatus.OPENED : SidebarStatus.CLOSED
}
const closeSidebar = () => {
sidebar.opened = false
sidebarStatus.value = SidebarStatus.CLOSED
}
const openSidebar = () => {
sidebar.opened = true
sidebarStatus.value = SidebarStatus.OPENED
}
return {
sidebar,
toggleSidebar,
closeSidebar,
openSidebar
}
})
// 手动提供给 useStore() 函数 pinia 实例
// https://pinia.vuejs.org/zh/core-concepts/outside-component-usage.html#using-a-store-outside-of-a-component
export function useAppStoreHook() {
return useAppStore(store)
}/**
* 侧边栏状态枚举
*/
export const enum SidebarStatus {
/**
* 展开
*/
OPENED = 'opened',
/**
* 关闭
*/
CLOSED = 'closed'
}import type { App } from 'vue'
const store = createPinia()
// 全局注册 store
export function setupStore(app: App<Element>) {
app.use(store)
}
export * from './modules/user'
export * from './modules/permission'
export * from './modules/app'
export { store }import type { App } from 'vue'
import * as ElementPlusIconsVue from '@element-plus/icons-vue'
// 注册所有图标
export const setupElIcons = (app: App<Element>) => {
for (const [key, component] of Object.entries(ElementPlusIconsVue)) {
app.component(key, component)
}
}import '@/styles/index.scss'
import 'normalize.css/normalize.css'
import App from './App.vue'
import router from '@/router'
import { setupStore } from '@/stores'
import { setupElIcons, setupPermission } from '@/plugins'
// 本地SVG图标
import 'virtual:svg-icons-register'
// 全局动画库
import 'animate.css'
const app = createApp(App)
// 全局注册store状态管理
setupStore(app)
// 全局注册Element-plus图标
setupElIcons(app)
// 注册动态路由
setupPermission()
app.use(router).mount('#app')呈现效果如下所示: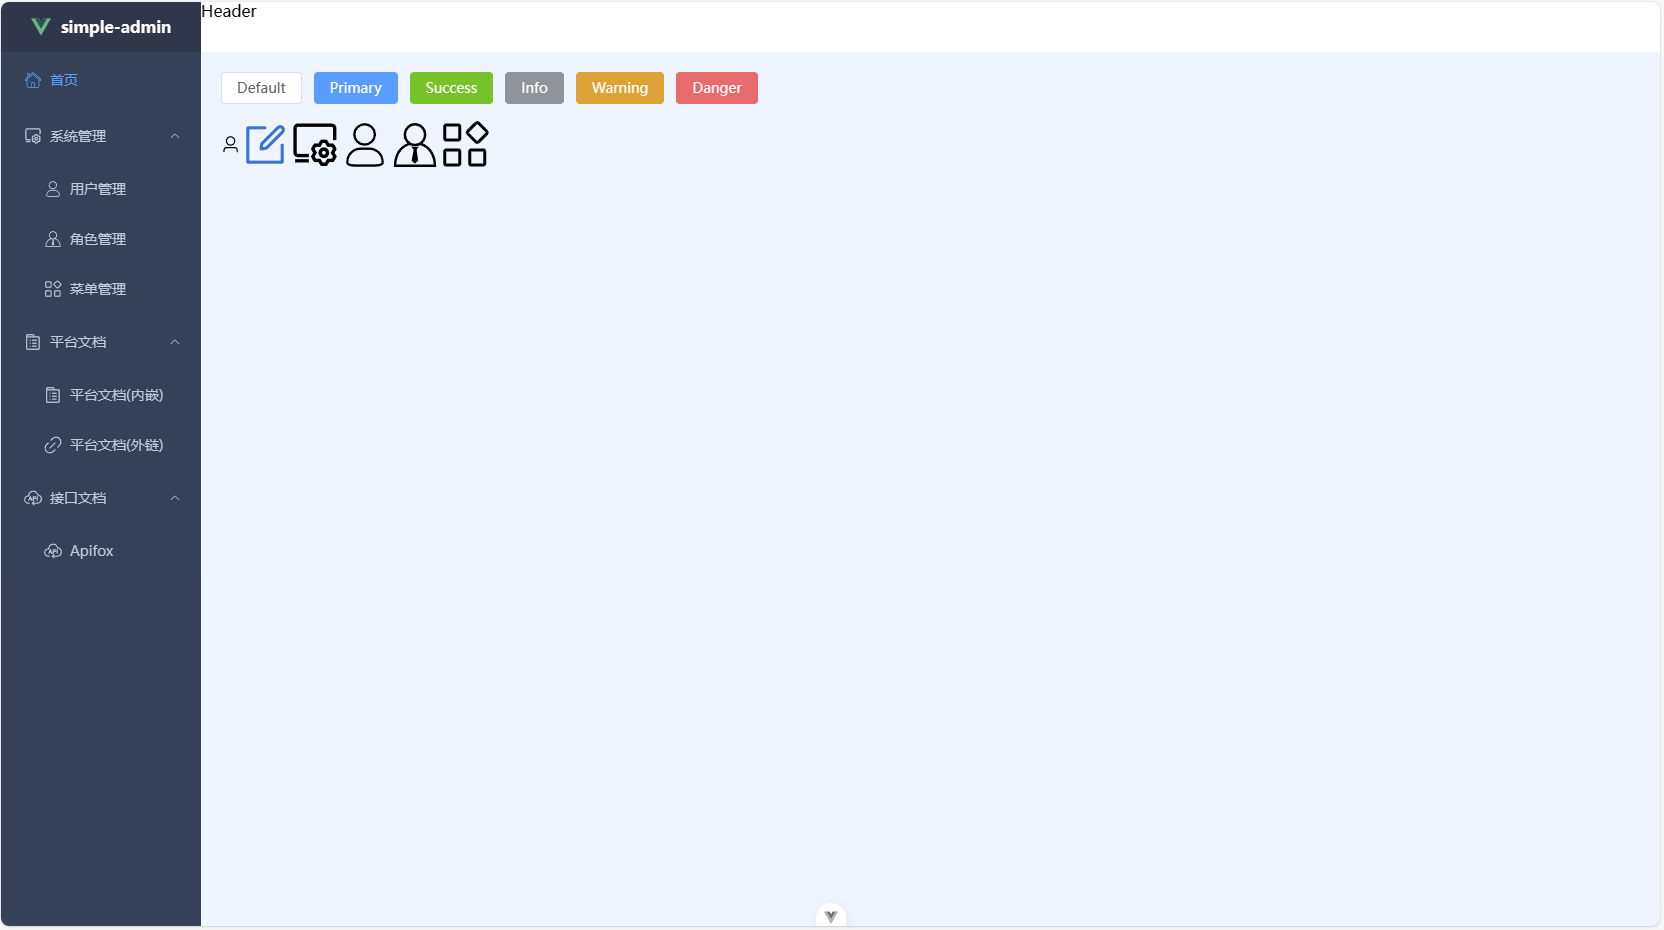
顶部导航栏
在该区域存在用于折叠展开侧边栏的按钮,指示当前所处页面路径的面包屑,用于进入全屏模式的按钮以及展示当前登录信息的头像和名称部分(点击该部分可以实现用户注销登出操作)。
<script lang="ts" setup>
defineOptions({
  name: 'NavBar'
})
</script>

<template>
  <!-- 顶部导航栏 -->
  <div class="h-full w-full bg-white flex items-center justify-between">
    <!--  左侧导航栏  -->
    <NavBarLeft />
    <!--  右侧导航栏  -->
    <NavBarRight />
  </div>
</template>

<style lang="scss" scoped></style><script lang="ts" setup>
import { useAppStore } from '@/stores'
const appStore = useAppStore()
</script>
<template>
<div class="flex items-center">
<Hamburger :is-active="appStore.sidebar.opened" @toggle-click="appStore.toggleSidebar" />
<Breadcrumb />
</div>
</template>
<style lang="scss" scoped></style><script lang="ts" setup>
defineProps<{
isActive: boolean
}>()
defineEmits<{
(e: 'toggleClick'): void
}>()
</script>
<template>
<div
class="px-[15px] flex items-center justify-center color-[var(--el-text-color-regular)]"
@click="$emit('toggleClick')"
>
<svg-icon :class="{ 'is-active': isActive }" class="hamburger" icon-class="indent-decrease" />
</div>
</template>
<style lang="scss" scoped>
.hamburger {
vertical-align: middle;
cursor: pointer;
transform: scaleX(-1);
}
.hamburger.is-active {
transform: scaleX(1);
}
</style><script lang="ts" setup>
import type { RouteLocationMatched } from 'vue-router'
import { compile } from 'path-to-regexp'
const breadcrumbs = ref<RouteLocationMatched[]>([])
const route = useRoute()
const router = useRouter()
onBeforeMount(() => {
getBreadcrumbs()
})
watch(
() => route.path,
(path) => {
if (path.startsWith('/redirect')) return
getBreadcrumbs()
}
)
/**
* 根据当前路由信息获取面包屑数据
*/
const getBreadcrumbs = () => {
const matched = route.matched.filter((item) => item.meta && item.meta.title)
const first = matched[0]
if (first && !isHome(first)) {
matched.unshift({ path: '/home', meta: { title: '首页' } } as any)
}
breadcrumbs.value = matched.filter(
(item) => item.meta && item.meta.title && item.meta.breadcrumb !== false
)
}
/**
* 判断是否为首页
* @param route 路由信息
*/
const isHome = (route: RouteLocationMatched) => {
const name = route.name
if (!name) return false
return name.toString().trim().toLocaleLowerCase() === 'home'.toLocaleLowerCase()
}
const pathCompile = (path: string) => {
const { params } = route
const toPath = compile(path)
return toPath(params)
}
const handleClick = (item: RouteLocationMatched) => {
const { redirect, path } = item
if (redirect) {
router.push(redirect.toString()).catch((err) => {
console.warn(err)
})
return
}
router.push(pathCompile(path)).catch((err) => {
console.warn(err)
})
}
</script>
<template>
<el-breadcrumb class="!inline-block !text-[14px] !leading-[50px] !ml-[8px]">
<transition-group enter-active-class="animate__animated animate__fadeInRight">
<el-breadcrumb-item v-for="(item, index) in breadcrumbs" :key="item.path">
<span
v-if="item.redirect === 'noredirect' || index === breadcrumbs.length - 1"
class="!font-normal !color-[#97a8be] !cursor-text"
>
{{ item.meta.title }}
</span>
<a v-else class="!font-semibold" @click.prevent="handleClick(item)">
{{ item.meta.title }}
</a>
</el-breadcrumb-item>
</transition-group>
</el-breadcrumb>
</template>
<style lang="scss" scoped></style><script lang="ts" setup>
import { useUserStore } from '@/stores'
const { isFullscreen, toggle } = useFullscreen()
const userStore = useUserStore()
const router = useRouter()
const route = useRoute()
/**
* 注销登出
*/
const logout = () => {
ElMessageBox.confirm('确定注销并退出系统吗?', '提示', {
confirmButtonText: '确定',
cancelButtonText: '取消',
type: 'warning',
lockScroll: false
}).then(async () => {
await userStore.logout()
await router.push(`/login?redirect=${route.fullPath}`)
})
}
</script>
<template>
<div>
<!--全屏 -->
<div class="setting-item" @click="toggle">
<svg-icon :icon-class="isFullscreen ? 'fullscreen-exit' : 'fullscreen'" />
</div>
<!-- 用户头像 -->
<el-dropdown class="setting-item" trigger="click">
<div class="flex items-center justify-center h-full p-[10px]">
<el-avatar :src="userStore.userInfo.avatar" class="mr-[5px]" />
<span>{{ userStore.userInfo.username }}</span>
</div>
<template #dropdown>
<el-dropdown-menu>
<el-dropdown-item>
<el-icon>
<IEpInfoFilled />
</el-icon>
<span>个人信息</span>
</el-dropdown-item>
<el-dropdown-item>
<el-icon>
<IEpUnlock />
</el-icon>
<span>修改密码</span>
</el-dropdown-item>
<el-dropdown-item divided @click="logout">
<el-icon>
<IEpCircleClose />
</el-icon>
<span>注销登出</span>
</el-dropdown-item>
</el-dropdown-menu>
</template>
</el-dropdown>
</div>
</template>
<style lang="scss" scoped>
.setting-item {
@apply inline-block min-w-[40px] h-[50px] leading-[50px] text-center cursor-pointer hover:bg-black hover:bg-opacity-10;
}
:deep(.el-dropdown-menu__item) {
line-height: 36px !important;
padding: 6px 22px;
}
</style>import { getUserInfoApi } from '@/api/user'
import type { UserInfo } from '@/api/user/types'
import type { LoginRequest } from '@/api/auth/types'
import { loginApi, logoutApi } from '@/api/auth'
import { store } from '@/stores'
export const useUserStore = defineStore('user', () => {
// 使用 VueUse 中的 useStorage 函数将 token 保存到 localStorage 中
const token = useStorage('token', '')
const userInfo = ref<UserInfo>({
roles: [],
permissions: []
})
/**
* 登录
* @param loginRequest 用户登录请求参数
*/
const login = (loginRequest: LoginRequest) => {
return new Promise<void>((resolve, reject) => {
loginApi(loginRequest)
.then(({ accessToken }) => {
token.value = accessToken
resolve()
})
.catch((err) => {
reject(err)
})
})
}
/**
* 清除token
*/
const resetToken = () => {
return new Promise<void>((resolve) => {
token.value = ''
resolve()
})
}
/**
* 获取当前登录用户信息
*/
const getUserInfo = () => {
return new Promise<UserInfo>((resolve, reject) => {
getUserInfoApi()
.then((res) => {
if (!res) {
reject('Verification failed, please Login again.')
return
}
if (!res.roles || res.roles.length <= 0) {
reject('getUserInfo: roles must be a non-null array!')
return
}
userInfo.value = res
resolve(res)
})
.catch((err) => {
reject(err)
})
})
}
/**
* 注销登出
*/
const logout = () => {
return new Promise<void>((resolve, reject) => {
logoutApi()
.then(() => {
token.value = ''
location.reload()
resolve()
})
.catch((err) => {
reject(err)
})
})
}
return { token, userInfo, login, resetToken, getUserInfo, logout }
})
// 非setup
export const useUserStoreHook = () => {
return useUserStore(store)
}import { post, request } from '@/utils/request'
import type { LoginRequest, LoginResult } from '@/api/auth/types'
/**
* 用户登录
* @param loginRequest 用户登录请求参数
*/
export const loginApi = (loginRequest: LoginRequest) => {
return post<LoginResult>('/auth/login', loginRequest)
}
/**
* 用户登出
*/
export const logoutApi = () => {
return request<void>({
url: '/auth/logout',
method: 'DELETE'
})
}呈现效果如下所示: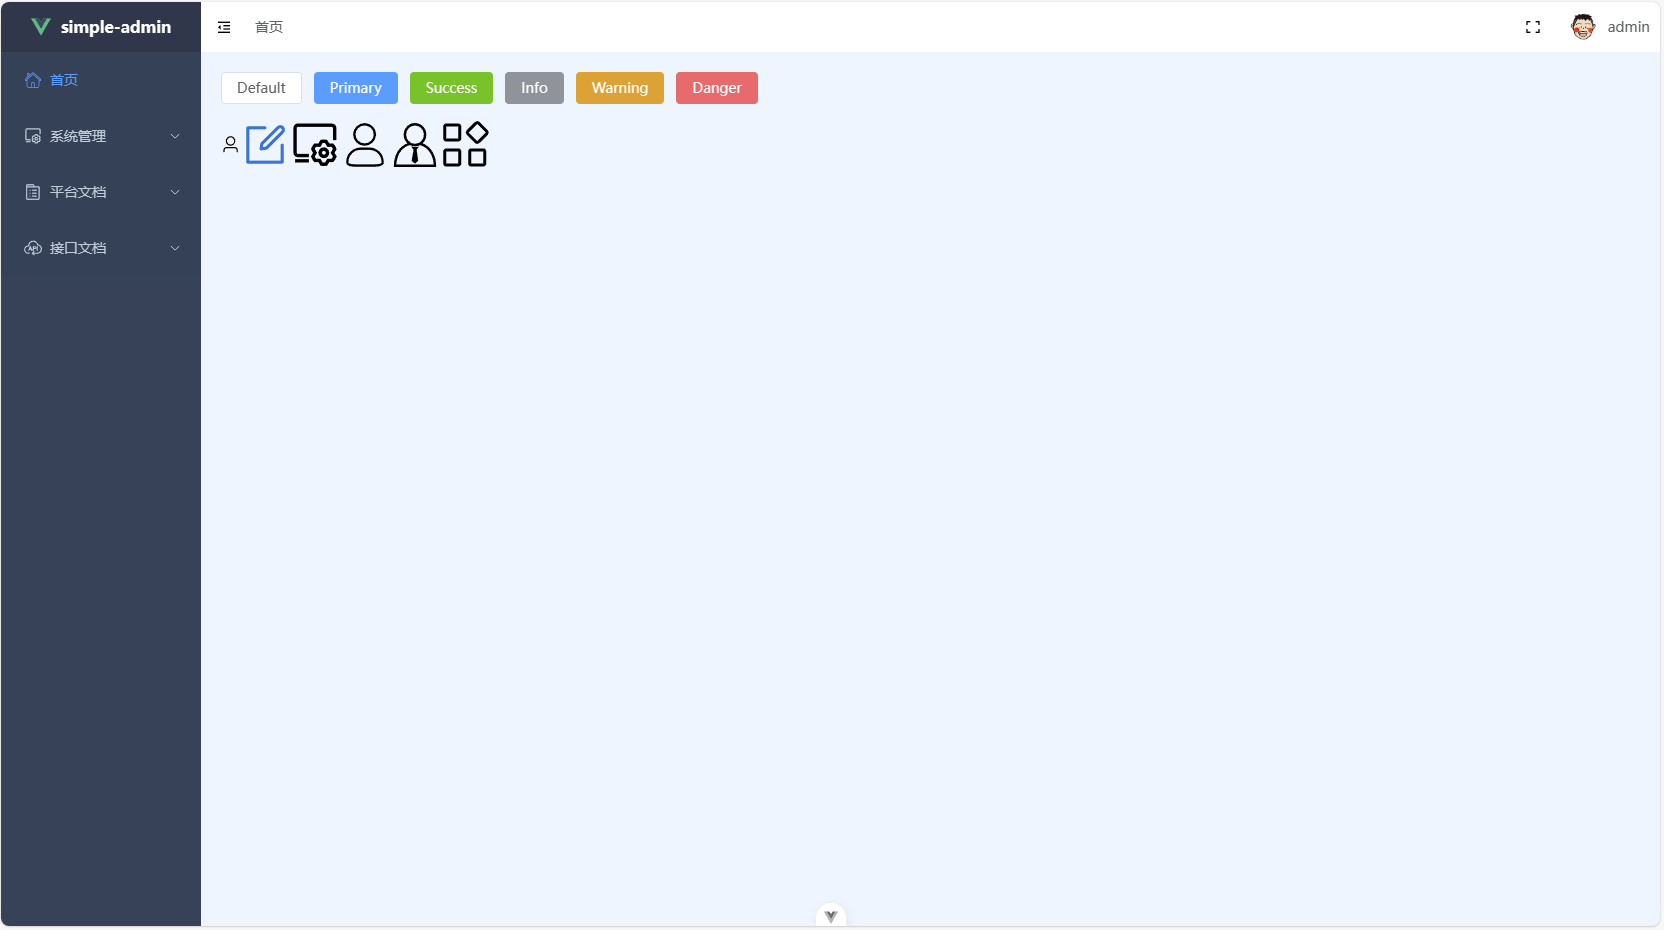
标签导航栏
定义一个 tagsViewStore 用于维护以下两个数组:
visitedViews:用户访问过的页面,对应标签栏导航上显示的一个个标签数组集合;cachedViews:用户访问过的页面 && 能被缓存的页面(实际被keep-alive作用的路由)。可以在配置路由的时候通过meta.keepAlive来配置是否需要缓存这个路由。
Note
由于目前 keep-alive 和 router-view 是强耦合的,而且查看文档不难发现 keep-alive 的 include 会根据组件的 name 选项进行匹配,所以在编写路由 router 和路由对应的 view component 的时候一定要确保两者的 name 是完全一致的。切记 name 命名时候尽量保证唯一性,切记不要和某些组件的命名重复了,不然最后会因为递归引用从而导致内存溢出等问题
<script lang="ts" setup>
import { useTagsViewStore } from '@/stores'

defineOptions({
  name: 'AppMain'
})

const { cachedViews } = storeToRefs(useTagsViewStore())
</script>

<template>
  <section class="w-full h-full">
    <router-view>
      <template #default="{ Component, route }">
        <keep-alive :include="cachedViews">
          <component :is="Component" :key="route.path" />
        </keep-alive>
      </template>
    </router-view>
  </section>
</template>

<style lang="scss" scoped></style><script lang="ts" setup>
import { usePermissionStore, useTagsViewStore } from '@/stores'
import type { RouteRecordRaw } from 'vue-router'
import { resolve } from 'path-browserify'
const tagsViewStore = useTagsViewStore()
const { visitedViews: tagList } = storeToRefs(tagsViewStore)
const route = useRoute()
const router = useRouter()
const permissionStore = usePermissionStore()
const affixTags = ref<TagView[]>([])
const contentMenuVisible = ref(false)
const left = ref(0)
const top = ref(0)
const selectedTag = ref<TagView>({
path: '',
fullPath: '',
name: '',
title: '',
affix: false,
keepAlive: false
})
const { proxy } = getCurrentInstance()!
/**
* 初始化固定标签
*/
const initAffixTags = () => {
const tags: TagView[] = filterAffixTags(permissionStore.routes)
tags.filter((tag) => tag.name).forEach((tag) => tagsViewStore.addVisitedView(tag))
affixTags.value = tags
}
/**
* 过滤出要固定显示的标签
* @param routes 路由列表
* @param basePath 基础路径
*/
const filterAffixTags = (routes: RouteRecordRaw[], basePath = '/') => {
let tags: TagView[] = []
routes.forEach((route) => {
const tagPath = resolve(basePath, route.path)
if (route.meta?.affix) {
tags.push({
name: route.name as string,
title: route.meta.title || 'no-name',
path: tagPath,
fullPath: tagPath,
affix: true,
keepAlive: route.meta.keepAlive
})
}
if (route.children) {
const tempTags = filterAffixTags(route.children, tagPath)
if (tempTags.length > 0) {
tags = tags.concat(tempTags)
}
}
})
return tags
}
onMounted(() => {
initAffixTags()
})
/**
* 添加标签
*/
const addTag = () => {
if (!route.meta.title) return
tagsViewStore.addView({
name: route.name as string,
title: route.meta.title,
path: route.path,
fullPath: route.fullPath,
affix: route.meta.affix,
keepAlive: route.meta.keepAlive
})
}
/**
* 移动到当前标签
*/
const moveToCurrentTag = () => {
// 使用 nextTick 的目的是确保在更新 tagsView 组件之前,滚动条已经滚动到了正确的位置
nextTick(() => {
tagList.value
.filter((tag) => tag.path === route.path)
.forEach((tag) => {
// when query is different then update
// route.query = {...route.query, ...tag.query}
if (tag.fullPath !== route.fullPath) {
tagsViewStore.updateVisitedView({
name: route.name as string,
title: route.meta.title || 'no-name',
path: route.path,
fullPath: route.fullPath,
affix: route.meta.affix,
keepAlive: route.meta.keepAlive
})
}
})
})
}
watch(
route,
() => {
addTag()
moveToCurrentTag()
},
{
immediate: true
}
)
/**
* 判断标签是否处于激活状态
* @param tag 标签
*/
const isActive = (tag: TagView) => {
return tag.path === route.path
}
/**
* 判断标签是否固定显示
* @param tag 标签
*/
const isAffix = (tag: TagView) => {
return tag.affix
}
/**
* 跳转到最后一个标签
* @param visitedViews 已访问的标签列表
* @param view 当前标签
*/
const toLastView = (visitedViews: TagView[], view?: TagView) => {
const lastView = visitedViews.slice(-1)[0]
if (lastView && lastView.fullPath) {
router.push(lastView.fullPath)
} else {
// now the default is to redirect to the home page if there is no tags-view,
// you can adjust it according to your needs.
if (view?.name === 'Home') {
// to reload home page
router.replace({ path: '/redirect' + view.fullPath })
} else {
router.push('/')
}
}
}
/**
* 关闭选中标签
* @param tag 标签
*/
const closeSelectedTag = async (tag: TagView) => {
const { visitedViews } = await tagsViewStore.deleteView(tag)
if (isActive(tag)) {
toLastView(visitedViews, tag)
}
}
watch(contentMenuVisible, (value) => {
if (value) {
document.body.addEventListener('click', closeContentMenu)
} else {
document.body.removeEventListener('click', closeContentMenu)
}
})
/**
* 关闭右键菜单
*/
const closeContentMenu = () => {
contentMenuVisible.value = false
}
/**
* 打开右键菜单
* @param tag 标签
* @param e 鼠标事件
*/
const openContextMenu = (tag: TagView, e: MouseEvent) => {
const menuMinWidth = 150
const offsetLeft = proxy?.$el.getBoundingClientRect().left
const offsetWidth = proxy?.$el.offsetWidth
const maxLeft = offsetWidth - menuMinWidth
const l = e.clientX - offsetLeft + 15
if (l > maxLeft) {
left.value = maxLeft
} else {
left.value = l
}
top.value = e.clientY - 50
contentMenuVisible.value = true
selectedTag.value = tag
}
/**
* 刷新选中的标签
* @param tag 标签
*/
const refreshSelectedTag = (tag: TagView) => {
tagsViewStore.deleteCachedView(tag)
nextTick(() => {
router.replace({ path: '/redirect' + tag.fullPath })
})
}
/**
* 关闭其它标签
*/
const closeOtherTags = async () => {
await router.push(selectedTag.value)
await tagsViewStore.deleteOtherViews(selectedTag.value)
moveToCurrentTag()
}
/**
* 判断是否为第一个标签(首页或者第一个标签)
*/
const isFirstView = () => {
try {
return (
selectedTag.value.path === '/home' ||
selectedTag.value.fullPath === tagsViewStore.visitedViews[1].fullPath
)
} catch (err) {
return false
}
}
/**
* 关闭左侧标签
*/
const closeLeftTags = async () => {
const { visitedViews } = await tagsViewStore.deleteLeftViews(selectedTag.value)
if (!visitedViews.find((item) => item.path === route.path)) {
toLastView(visitedViews)
}
}
/**
* 判断是否为最后一个标签
*/
const isLastView = () => {
try {
return (
selectedTag.value.fullPath ===
tagsViewStore.visitedViews[tagsViewStore.visitedViews.length - 1].fullPath
)
} catch (err) {
return false
}
}
/**
* 关闭右侧标签
*/
const closeRightTags = async () => {
const { visitedViews } = await tagsViewStore.deleteRightViews(selectedTag.value)
if (!visitedViews.find((item) => item.path === route.path)) {
toLastView(visitedViews)
}
}
/**
* 关闭所有标签
* @param tag 标签
*/
const closeAllTags = async (tag: TagView) => {
const { visitedViews } = await tagsViewStore.deleteAllViews()
toLastView(visitedViews, tag)
}
</script>
<template>
<div class="tags-container">
<el-scrollbar class="scrollbar-container">
<router-link
v-for="tag in tagList"
:key="tag.fullPath"
:class="{ active: isActive(tag) }"
:to="{ path: tag.path, query: tag.query }"
class="tag-item"
@click.middle="!isAffix(tag) && closeSelectedTag(tag)"
@contextmenu.prevent="openContextMenu(tag, $event)"
>
{{ tag.title }}
<el-icon
v-if="!isAffix(tag)"
class="close-icon"
size="12px"
@click.prevent.stop="closeSelectedTag(tag)"
>
<IEpClose />
</el-icon>
</router-link>
</el-scrollbar>
<!-- tag标签操作菜单 -->
<ul
v-show="contentMenuVisible"
:style="{ left: left + 'px', top: top + 'px' }"
class="contextmenu"
>
<li @click="refreshSelectedTag(selectedTag)">
<svg-icon icon-class="refresh" />
刷新
</li>
<li v-if="!isAffix(selectedTag)" @click="closeSelectedTag(selectedTag)">
<svg-icon icon-class="close" />
关闭
</li>
<li @click="closeOtherTags">
<svg-icon icon-class="close_other" />
关闭其它
</li>
<li v-if="!isFirstView()" @click="closeLeftTags">
<svg-icon icon-class="close_left" />
关闭左侧
</li>
<li v-if="!isLastView()" @click="closeRightTags">
<svg-icon icon-class="close_right" />
关闭右侧
</li>
<li @click="closeAllTags(selectedTag)">
<svg-icon icon-class="close_all" />
关闭所有
</li>
</ul>
</div>
</template>
<style lang="scss" scoped>
.tags-container {
@apply w-full h-[34px] bg-[var(--el-bg-color)] border border-solid border-[var(--el-border-color-light)] shadow-[0_1px_1px_var(--el-box-shadow-light)];
.scrollbar-container {
@apply relative w-full overflow-hidden whitespace-nowrap;
.el-scrollbar__bar {
@apply bottom-0;
}
.el-scrollbar__wrap {
@apply h-[49px];
}
.tag-item {
@apply inline-block py-[3px] px-[8px] mt-[4px] mr-0 mb-0 ml-[5px] text-[12px] cursor-pointer border border-solid border-[var(--el-border-color-light)]
hover:text-[var(--el-color-primary)] first-of-type:ml-[15px] last-of-type:mr-[15px];
.close-icon {
@apply rounded-[50%] hover:text-white hover:bg-[var(--el-color-primary)];
}
&.active {
@apply text-white bg-[var(--el-color-primary)] before:inline-block before:w-[8px] before:h-[8px] before:mr-[5px] before:content-[""] before:bg-white before:rounded-[50%];
.close-icon {
@apply hover:text-[var(--el-color-primary)] hover:bg-[var(--el-fill-color-light)];
}
}
}
}
.contextmenu {
@apply absolute z-[99] text-[12px] bg-[var(--el-bg-color-overlay)] rounded shadow-[var(--el-box-shadow-light)];
li {
@apply py-[8px] px-[16px] cursor-pointer hover:bg-[var(--el-fill-color-light)];
}
}
}
</style><script lang="ts" setup>
import { useAppStore } from '@/stores'
defineOptions({
name: 'Layout'
})
const appStore = useAppStore()
</script>
<template>
<el-container class="w-screen h-screen">
<el-aside
:width="appStore.sidebar.opened ? '200px' : '64px'"
class="bg-[#344157] transition-[width] duration-[0.3s] ease-in-out"
>
<Sidebar />
</el-aside>
<el-container>
<el-header class="!px-0" height="84px">
<el-row>
<NavBar />
</el-row>
<el-row>
<TagsView />
</el-row>
</el-header>
<el-main class="bg-[#eef5ff]">
<AppMain />
</el-main>
</el-container>
</el-container>
</template>
<style lang="scss" scoped></style>export const useTagsViewStore = defineStore('tagsView', () => {
const visitedViews = ref<TagView[]>([])
const cachedViews = ref<string[]>([])
/**
* 添加一个视图到已访问列表中
* @param view 待添加的视图
*/
const addVisitedView = (view: TagView) => {
if (visitedViews.value.some((v) => v.path === view.path)) return
if (view.affix) {
visitedViews.value.unshift(view)
} else {
visitedViews.value.push(view)
}
}
/**
* 添加一个视图到缓存列表中
* @param view 待添加的视图
*/
const addCachedView = (view: TagView) => {
if (!view.keepAlive || cachedViews.value.includes(view.name)) return
cachedViews.value.push(view.name)
}
/**
* 添加一个视图到已访问和缓存列表中
* @param view 待添加的视图
*/
const addView = (view: TagView) => {
addVisitedView(view)
addCachedView(view)
}
/**
* 更新已访问列表中指定视图的信息
* @param view 待更新的视图
*/
const updateVisitedView = (view: TagView) => {
visitedViews.value.filter((v) => v.path === view.path).forEach((v) => Object.assign(v, view))
}
/**
* 删除已访问列表中指定视图
* @param view 待删除的视图
*/
const deleteVisitedView = (view: TagView): TagView[] => {
visitedViews.value = visitedViews.value.filter((v) => v.path !== view.path)
return [...visitedViews.value]
}
/**
* 删除缓存列表中指定视图
* @param view 待删除的视图
*/
const deleteCachedView = (view: TagView): string[] => {
cachedViews.value = cachedViews.value.filter((v) => v !== view.name)
return [...cachedViews.value]
}
/**
* 删除已访问和缓存列表中指定视图
* @param view
*/
const deleteView = (
view: TagView
): Promise<{
visitedViews: TagView[]
cachedViews: string[]
}> => {
return new Promise((resolve) => {
deleteVisitedView(view)
deleteCachedView(view)
resolve({
visitedViews: [...visitedViews.value],
cachedViews: [...cachedViews.value]
})
})
}
/**
* 删除已访问列表中除指定视图和固定视图之外的其他视图
* @param view 待删除的视图
*/
const deleteOtherVisitedViews = (view: TagView) => {
visitedViews.value = visitedViews.value.filter((v) => v.path === view.path || v.affix)
return [...visitedViews.value]
}
/**
* 删除缓存列表中除指定视图之外的其他视图
* @param view 待删除的视图
*/
const deleteOtherCachedViews = (view: TagView) => {
const index = cachedViews.value.indexOf(view.name)
if (index > -1) {
cachedViews.value = cachedViews.value.slice(index, index + 1)
} else {
cachedViews.value = []
}
return [...cachedViews.value]
}
/**
* 删除已访问和缓存列表中除指定视图和固定视图之外的其他视图
* @param view 待删除的视图
*/
const deleteOtherViews = (
view: TagView
): Promise<{
visitedViews: TagView[]
cachedViews: string[]
}> => {
return new Promise((resolve) => {
deleteOtherVisitedViews(view)
deleteOtherCachedViews(view)
resolve({
visitedViews: [...visitedViews.value],
cachedViews: [...cachedViews.value]
})
})
}
/**
* 删除已访问列表和缓存列表中指定视图之前除固定视图之外的其他视图
* @param view
*/
const deleteLeftViews = (view: TagView): Promise<{ visitedViews: TagView[] }> => {
return new Promise((resolve) => {
const currentIndex = visitedViews.value.findIndex((v) => v.path === view.path)
if (currentIndex === -1) return
visitedViews.value = visitedViews.value.filter((item, index) => {
if (index >= currentIndex || item.affix) return true
const cachedIndex = cachedViews.value.indexOf(item.name)
if (cachedIndex > -1) cachedViews.value.splice(cachedIndex, 1)
return false
})
resolve({
visitedViews: [...visitedViews.value]
})
})
}
/**
* 删除已访问列表和缓存列表中指定视图之后除固定视图之外的其他视图
* @param view 待删除的视图
*/
const deleteRightViews = (view: TagView): Promise<{ visitedViews: TagView[] }> => {
return new Promise((resolve) => {
const currentIndex = visitedViews.value.findIndex((v) => v.path === view.path)
if (currentIndex === -1) return
visitedViews.value = visitedViews.value.filter((item, index) => {
if (index <= currentIndex || item.affix) return true
})
resolve({
visitedViews: [...visitedViews.value]
})
})
}
/**
* 删除已访问列表中除固定视图之外的所有视图和缓存列表中的所有视图
*/
const deleteAllViews = (): Promise<{ visitedViews: TagView[]; cachedViews: string[] }> => {
return new Promise((resolve) => {
visitedViews.value = visitedViews.value.filter((v) => v.affix)
cachedViews.value = []
resolve({
visitedViews: [...visitedViews.value],
cachedViews: [...cachedViews.value]
})
})
}
return {
visitedViews,
cachedViews,
addVisitedView,
addView,
updateVisitedView,
deleteCachedView,
deleteView,
deleteOtherViews,
deleteLeftViews,
deleteRightViews,
deleteAllViews
}
})import type { App } from 'vue'
const store = createPinia()
// 全局注册 store
export function setupStore(app: App<Element>) {
app.use(store)
}
export * from './modules/user'
export * from './modules/permission'
export * from './modules/app'
export * from './modules/tagsView'
export { store }declare global {
/**
* 统一响应结构体
*/
interface Result<T> {
/**
* 响应码
*/
code: string
/**
* 响应消息
*/
msg: string
/**
* 响应数据
*/
data: T
}
/**
* 页签对象
*/
interface TagView {
/** 页签名称 */
name: string
/** 页签标题 */
title: string
/** 页签路由路径 */
path: string
/** 页签路由完整路径 */
fullPath: string
/** 页签图标 */
icon?: string
/** 是否固定页签 */
affix?: boolean
/** 是否开启缓存 */
keepAlive?: boolean
/** 路由查询参数 */
query?: any
}
}
export {}呈现效果如下所示: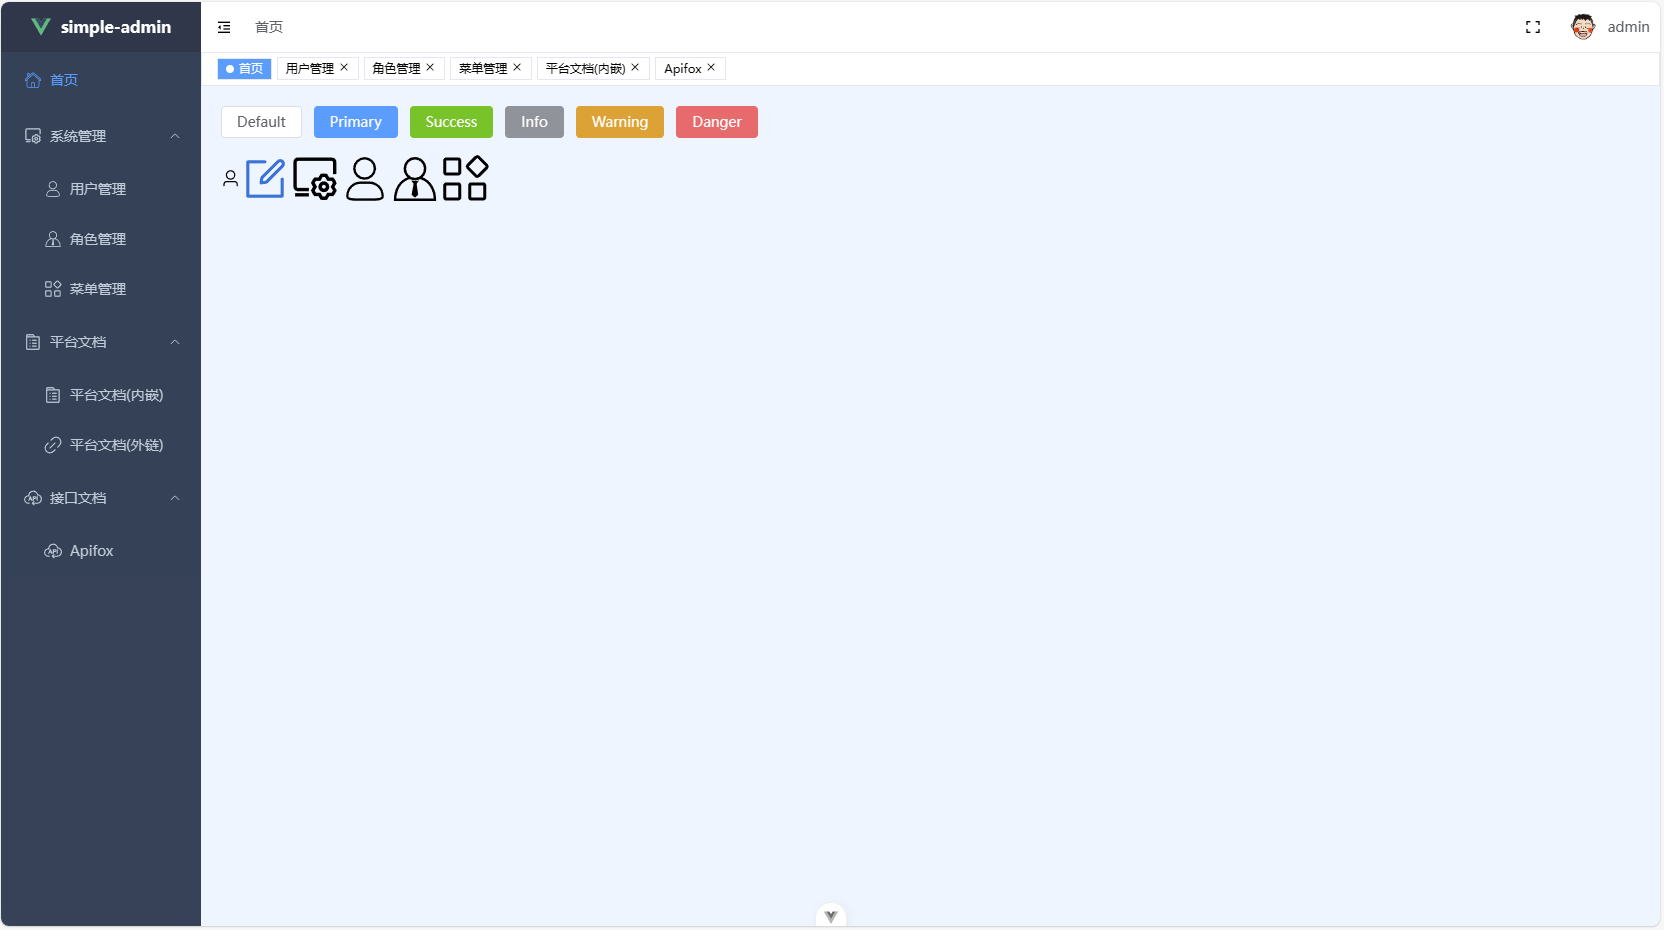
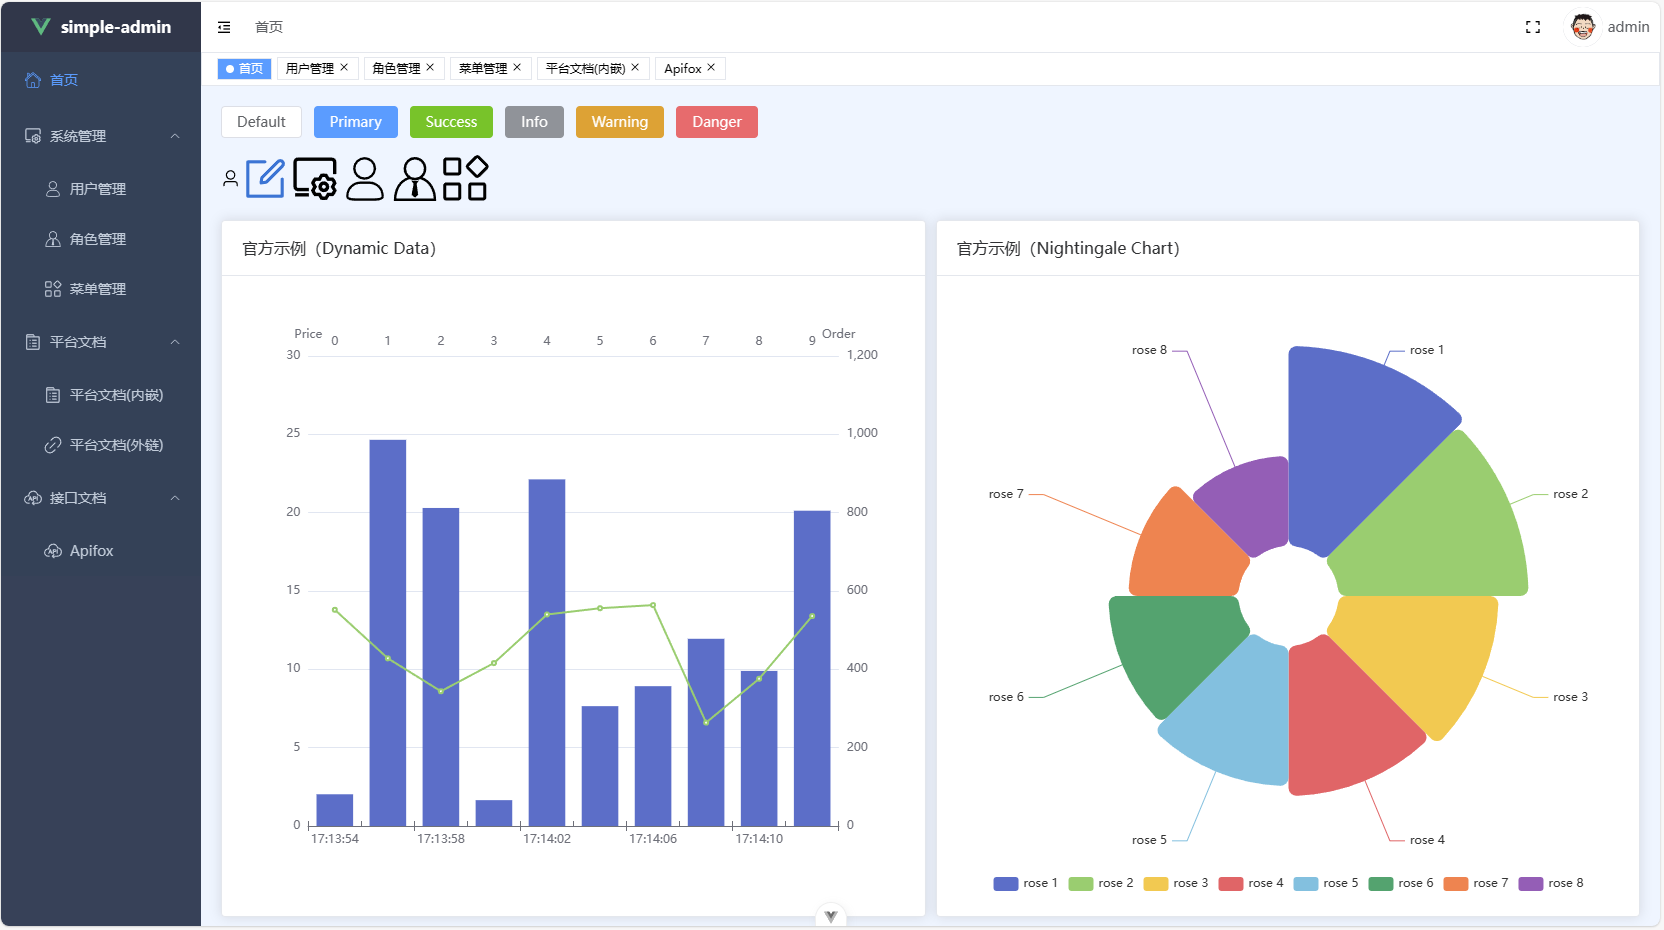
ECharts 图表集成
在 echarts 官网的扩展下载中,有一个 echarts 官方提供的 Vue 组件 ecomfe/vue-echarts: Vue.js component for Apache ECharts™. (github.com)。
安装:
pnpm i echarts vue-echarts全局注册 ECharts 组件:
tsimport type { App } from 'vue' import ECharts from 'vue-echarts' import type { ComposeOption } from 'echarts/core' import { use } from 'echarts/core' import type { BarSeriesOption, LineSeriesOption, PieSeriesOption } from 'echarts/charts' import { BarChart, LineChart, PieChart } from 'echarts/charts' import type { DataZoomComponentOption, GridComponentOption, LegendComponentOption, MarkLineComponentOption, MarkPointComponentOption, TitleComponentOption, ToolboxComponentOption, TooltipComponentOption } from 'echarts/components' import { DataZoomComponent, GridComponent, LegendComponent, MarkLineComponent, MarkPointComponent, TitleComponent, ToolboxComponent, TooltipComponent } from 'echarts/components' import { CanvasRenderer } from 'echarts/renderers' import { LabelLayout } from 'echarts/features' use([ TitleComponent, ToolboxComponent, TooltipComponent, GridComponent, LegendComponent, MarkLineComponent, MarkPointComponent, DataZoomComponent, BarChart, LineChart, PieChart, CanvasRenderer, LabelLayout ]) export type EChartsOption = ComposeOption< | TitleComponentOption | ToolboxComponentOption | TooltipComponentOption | GridComponentOption | LegendComponentOption | MarkLineComponentOption | MarkPointComponentOption | DataZoomComponentOption | BarSeriesOption | LineSeriesOption | PieSeriesOption > // 全局注册ECharts组件 export const setupECharts = (app: App<Element>) => { app.component('v-chart', ECharts) }tsexport * from './modules/permission' export * from './modules/icons' export * from './modules/echarts'tsimport '@/styles/index.scss' import 'normalize.css/normalize.css' import App from './App.vue' import router from '@/router' import { setupStore } from '@/stores' import { setupECharts, setupElIcons, setupPermission } from '@/plugins' // 本地SVG图标 import 'virtual:svg-icons-register' // 全局动画库 import 'animate.css' const app = createApp(App) // 全局注册store状态管理 setupStore(app) // 全局注册Element-plus图标 setupElIcons(app) // 注册ECharts图表 setupECharts(app) // 注册动态路由 setupPermission() app.use(router).mount('#app')ts/* eslint-disable */ /* prettier-ignore */ // @ts-nocheck // Generated by unplugin-vue-components // Read more: https://github.com/vuejs/core/pull/3399 export {} declare module 'vue' { export interface GlobalComponents { // ... VChart: (typeof import('vue-echarts'))['default'] } // ... }在首页中显示图表
vue<script lang="ts" setup> const charts = ref(['BarChart', 'PieChart']) const chartComponent = (chart: string) => { return defineAsyncComponent(() => import(`./components/${chart}.vue`)) } </script> <template> <div> <el-button>Default</el-button> <el-button type="primary">Primary</el-button> <el-button type="success">Success</el-button> <el-button type="info">Info</el-button> <el-button type="warning">Warning</el-button> <el-button type="danger">Danger</el-button> </div> <div class="mt-4 flex items-center"> <i-ep-user /> <el-icon :size="50" color="#1976D2"> <i-ep-edit /> </el-icon> <svg-icon icon-class="system" size="50" /> <svg-icon icon-class="user" size="50" /> <svg-icon icon-class="role" size="50" /> <svg-icon icon-class="menu" size="50" /> </div> <!-- ECharts图表 --> <el-row :gutter="10" class="m-4"> <el-col v-for="chart in charts" :key="chart" :lg="12" :xs="24" class="mb-2"> <component :is="chartComponent(chart)" /> </el-col> </el-row> </template> <style lang="scss" scoped></style>vue<script lang="ts" setup> import type { EChartsOption } from '@/plugins' const categories = (function () { let now = new Date() let res = [] let len = 10 while (len--) { res.unshift(now.toLocaleTimeString().replace(/^\D*/, '')) now = new Date(+now - 2000) } return res })() const categories2 = (function () { let res = [] let len = 10 while (len--) { res.push(10 - len - 1) } return res })() const data: number[] = (function () { let res = [] let len = 10 while (len--) { res.push(Math.round(Math.random() * 1000)) } return res })() const data2: number[] = (function () { let res = [] let len = 0 while (len < 10) { res.push(+(Math.random() * 10 + 5).toFixed(1)) len++ } return res })() const options = ref<EChartsOption>({ tooltip: { trigger: 'axis', axisPointer: { type: 'cross', label: { backgroundColor: '#283b56' } } }, dataZoom: { show: false, start: 0, end: 100 }, xAxis: [ { type: 'category', boundaryGap: true, data: categories }, { type: 'category', boundaryGap: true, data: categories2 } ], yAxis: [ { type: 'value', scale: true, name: 'Price', max: 30, min: 0, boundaryGap: [0.2, 0.2] }, { type: 'value', scale: true, name: 'Order', max: 1200, min: 0, boundaryGap: [0.2, 0.2] } ], series: [ { name: 'Dynamic Bar', type: 'bar', xAxisIndex: 1, yAxisIndex: 1, data: data }, { name: 'Dynamic Line', type: 'line', data: data2 } ] }) const app = { count: 11 } setInterval(function () { let axisData = new Date().toLocaleTimeString().replace(/^\D*/, '') data.shift() data.push(Math.round(Math.random() * 1000)) data2.shift() data2.push(+(Math.random() * 10 + 5).toFixed(1)) categories.shift() categories.push(axisData) categories2.shift() categories2.push(app.count++) Object.assign(options.value, { xAxis: [ { data: categories }, { data: categories2 } ], series: [ { data: data }, { data: data2 } ] }) }, 2100) </script> <template> <el-card> <template #header>官方示例(Dynamic Data)</template> <v-chart :option="options" autoresize class="h-[600px] w-full bg-[var(--el-bg-color-overlay)]" /> </el-card> </template> <style lang="scss" scoped></style>vue<script lang="ts" setup> import type { EChartsOption } from '@/plugins' const options = ref<EChartsOption>({ legend: { top: 'bottom' }, series: [ { name: 'Nightingale Chart', type: 'pie', radius: [50, 250], center: ['50%', '50%'], roseType: 'area', itemStyle: { borderRadius: 8 }, data: [ { value: 40, name: 'rose 1' }, { value: 38, name: 'rose 2' }, { value: 32, name: 'rose 3' }, { value: 30, name: 'rose 4' }, { value: 28, name: 'rose 5' }, { value: 26, name: 'rose 6' }, { value: 22, name: 'rose 7' }, { value: 18, name: 'rose 8' } ] } ] }) </script> <template> <el-card> <template #header>官方示例(Nightingale Chart)</template> <v-chart :option="options" autoresize class="h-[600px] w-full bg-[var(--el-bg-color-overlay)]" /> </el-card> </template> <style lang="scss" scoped></style>
呈现效果如下所示: